> ## Documentation Index
> Fetch the complete documentation index at: https://algolia.com/llms.txt
> Use this file to discover all available pages before exploring further.
# Get started with Vue InstantSearch
> Use Vue InstantSearch to create a dynamic, filterable search UI.
export const SearchQuery = () =>
search query
;
export const Index = () =>
index
;
export const Filter = () =>
filter
;
export const ApplicationID = () =>
application ID
;
export const APIKey = () =>
API key
;
export const FlavorSwitcher = ({current, baseHref = "", options = [], label = "InstantSearch framework"}) => {
if (options.length === 0) {
return
FlavorSwitcher requires at least one option.
;
}
const selected = options.find(option => option.value === current) ?? options[0];
return ;
};
## Before you begin
This quickstart assumes basic Vue knowledge.
It includes all the code, data, and credentials you need.
## Quickstart
In this quickstart, you'll add an Algolia search interface to some starter code.
The code:
* Displays and formats a search box and results
* Uses InstantSearch's pre-built UI components (widgets) to filter results
Run and edit the Vue InstantSearch quickstart example in CodeSandbox.
Browse the source for the Vue InstantSearch quickstart example on GitHub.
To generate some starter code, use the `create-instantsearch-app` tool.
It provides the data, all necessary code, and predefined credentials ( and ).
In a terminal, paste:
```sh Command line icon=square-terminal theme={"system"}
npx create-instantsearch-app ais-ecommerce-demo-app --template "Vue InstantSearch"
```
This command creates a folder structure on your machine:
```txt theme={"system"}
ais-ecommerce-demo-app/
├── node_modules/
├── src/
├──── App.vue
├──── main.js
├── package.json
├── README.md
└── yarn.lock
```
Open `src/App.vue` and replace the whole file with the following:
```vue Vue icon=code theme={"system"}
{{ item.name }}
```
1. In your terminal, type:
```sh Command line icon=square-terminal theme={"system"}
cd ais-ecommerce-demo-app
npm start
```
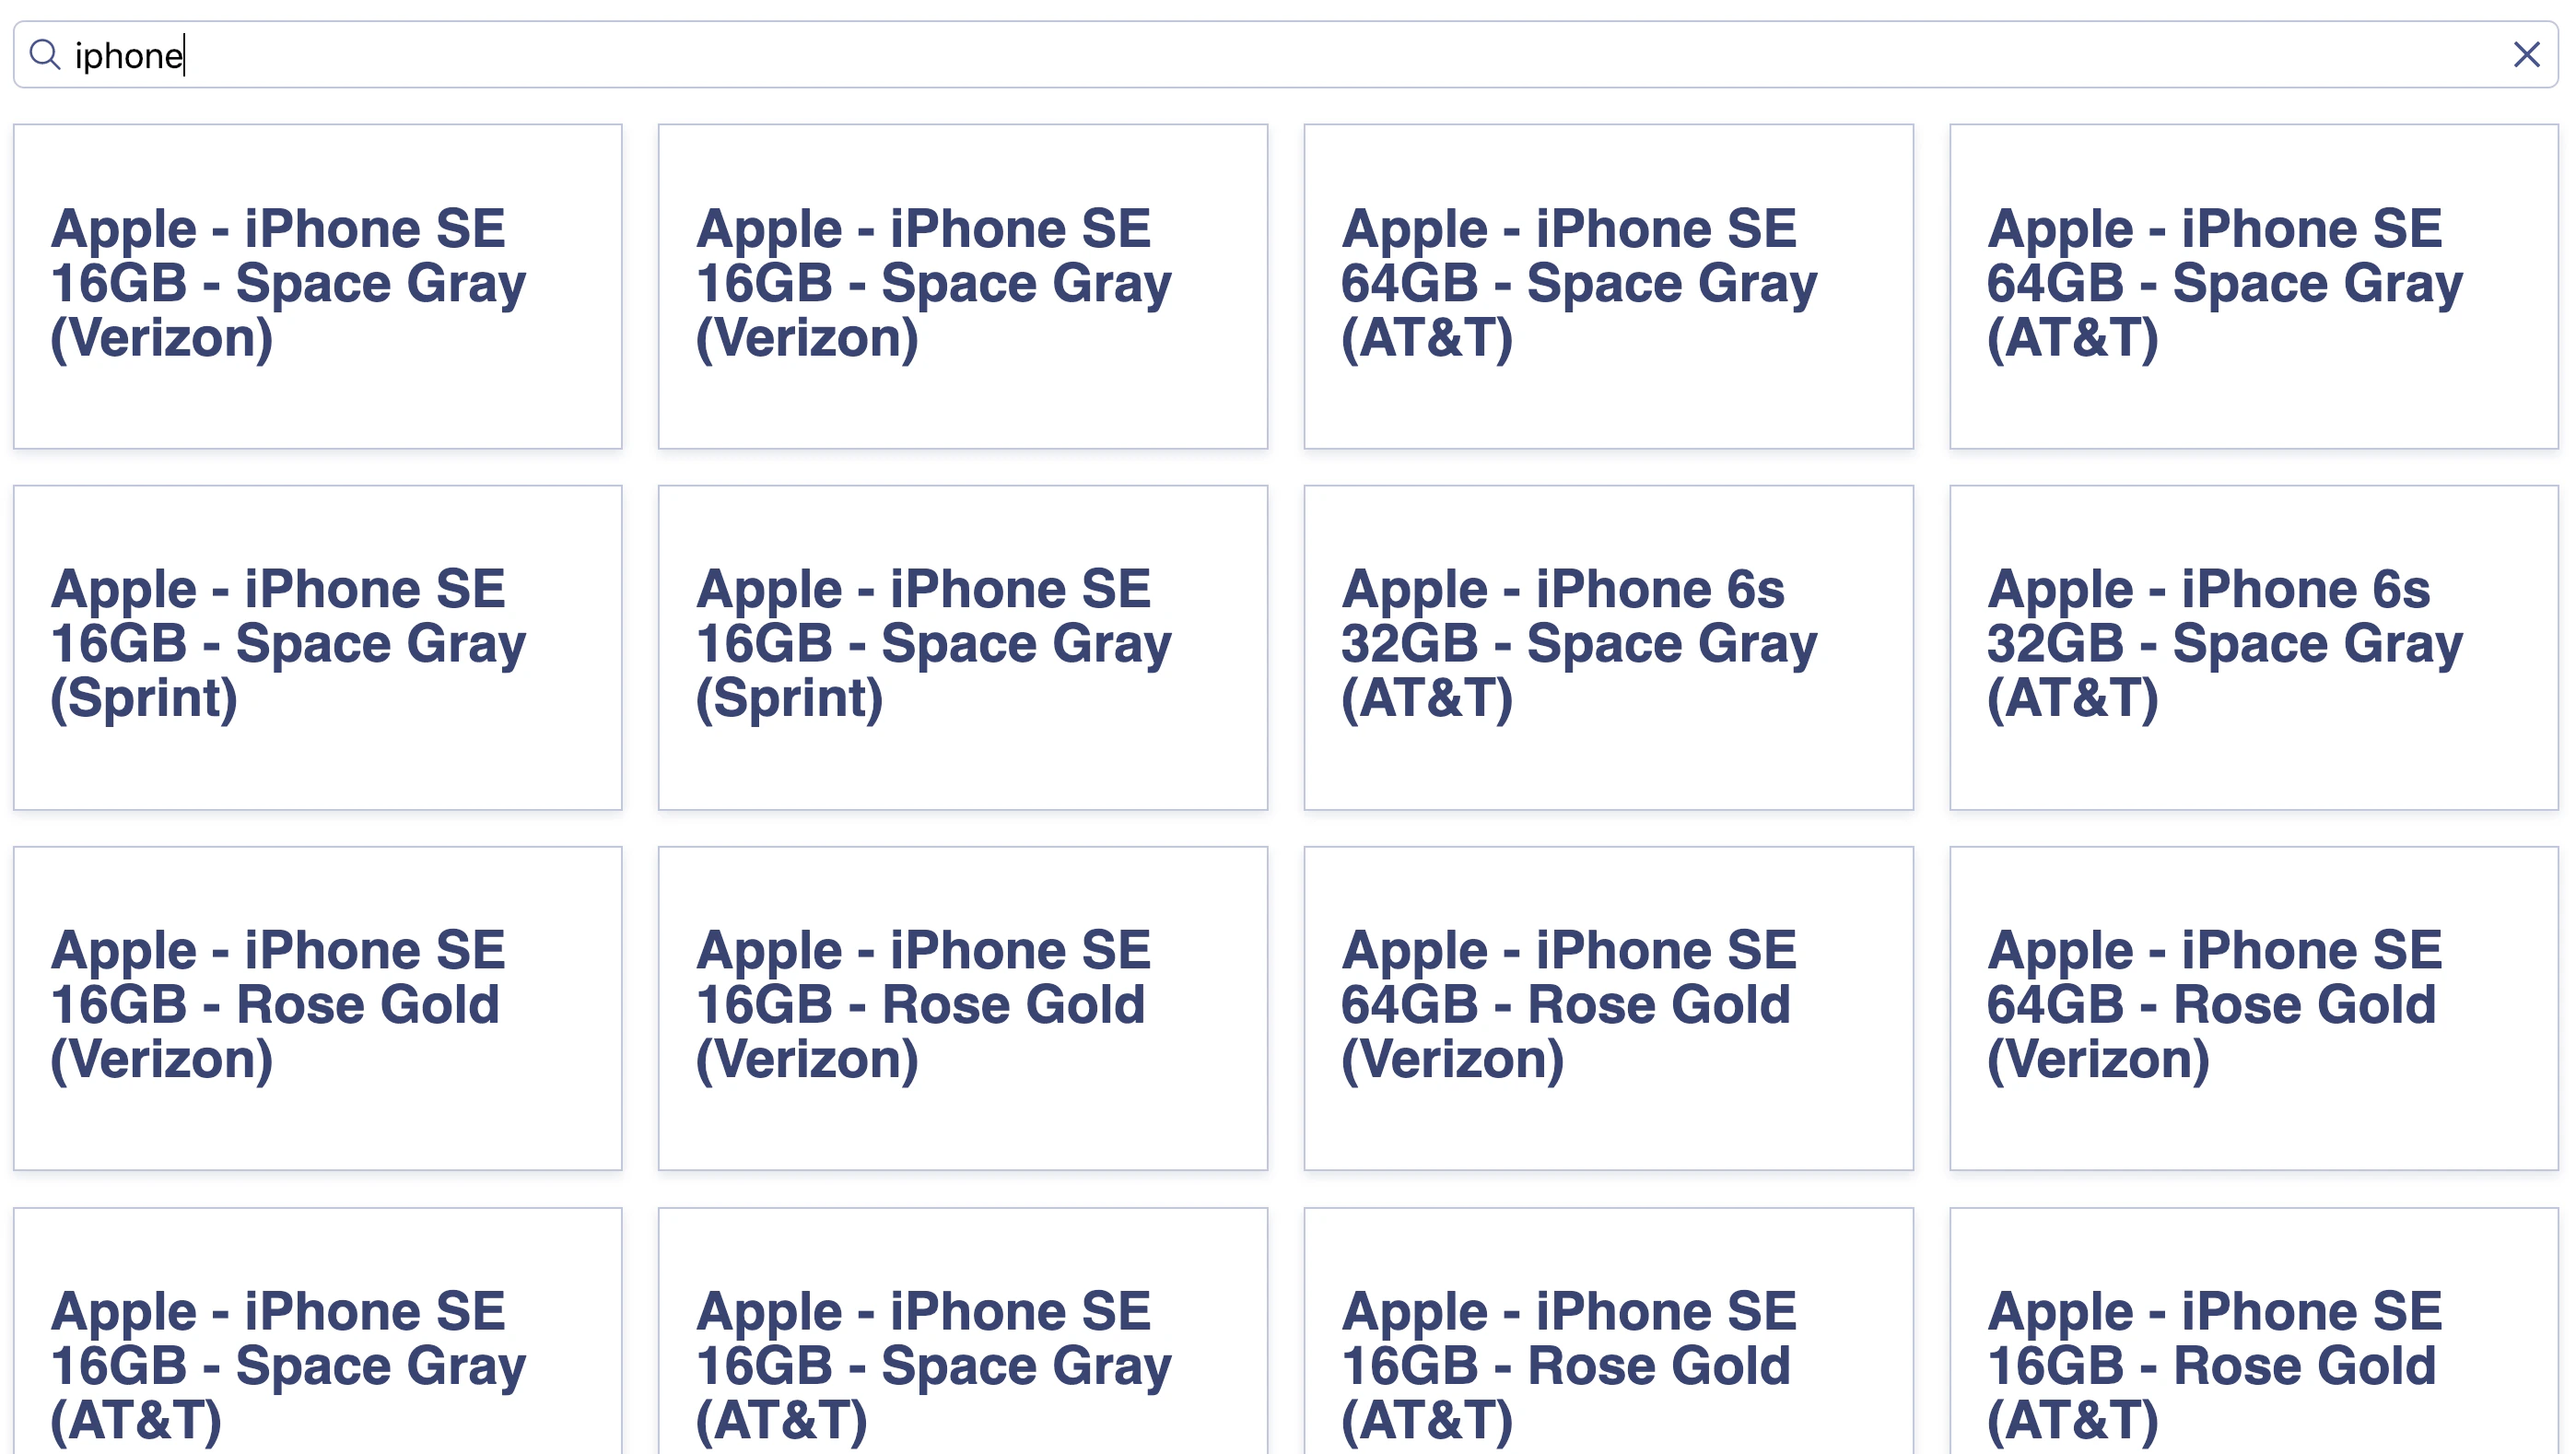
2. Open your browser and go to [http://localhost:3000](https://localhost:3000). The app displays the search box and results.
 Open `src/App.vue` and update it:
```vue Vue icon=code theme={"system"}
```
The widgets come with a [predefined style](/doc/guides/building-search-ui/widgets/customize-an-existing-widget/vue#style-your-widgets) but you can customize it.
1. Update the content of the style tag with the following to apply a two-column layout:
```css CSS icon=paintbrush theme={"system"}
body {
font-family: sans-serif;
padding: 1em;
}
.ais-Hits-list {
margin-top: 0;
margin-bottom: 1em;
}
.ais-InstantSearch {
display: grid;
grid-template-columns: 1fr 4fr;
grid-gap: 1em;
}
```
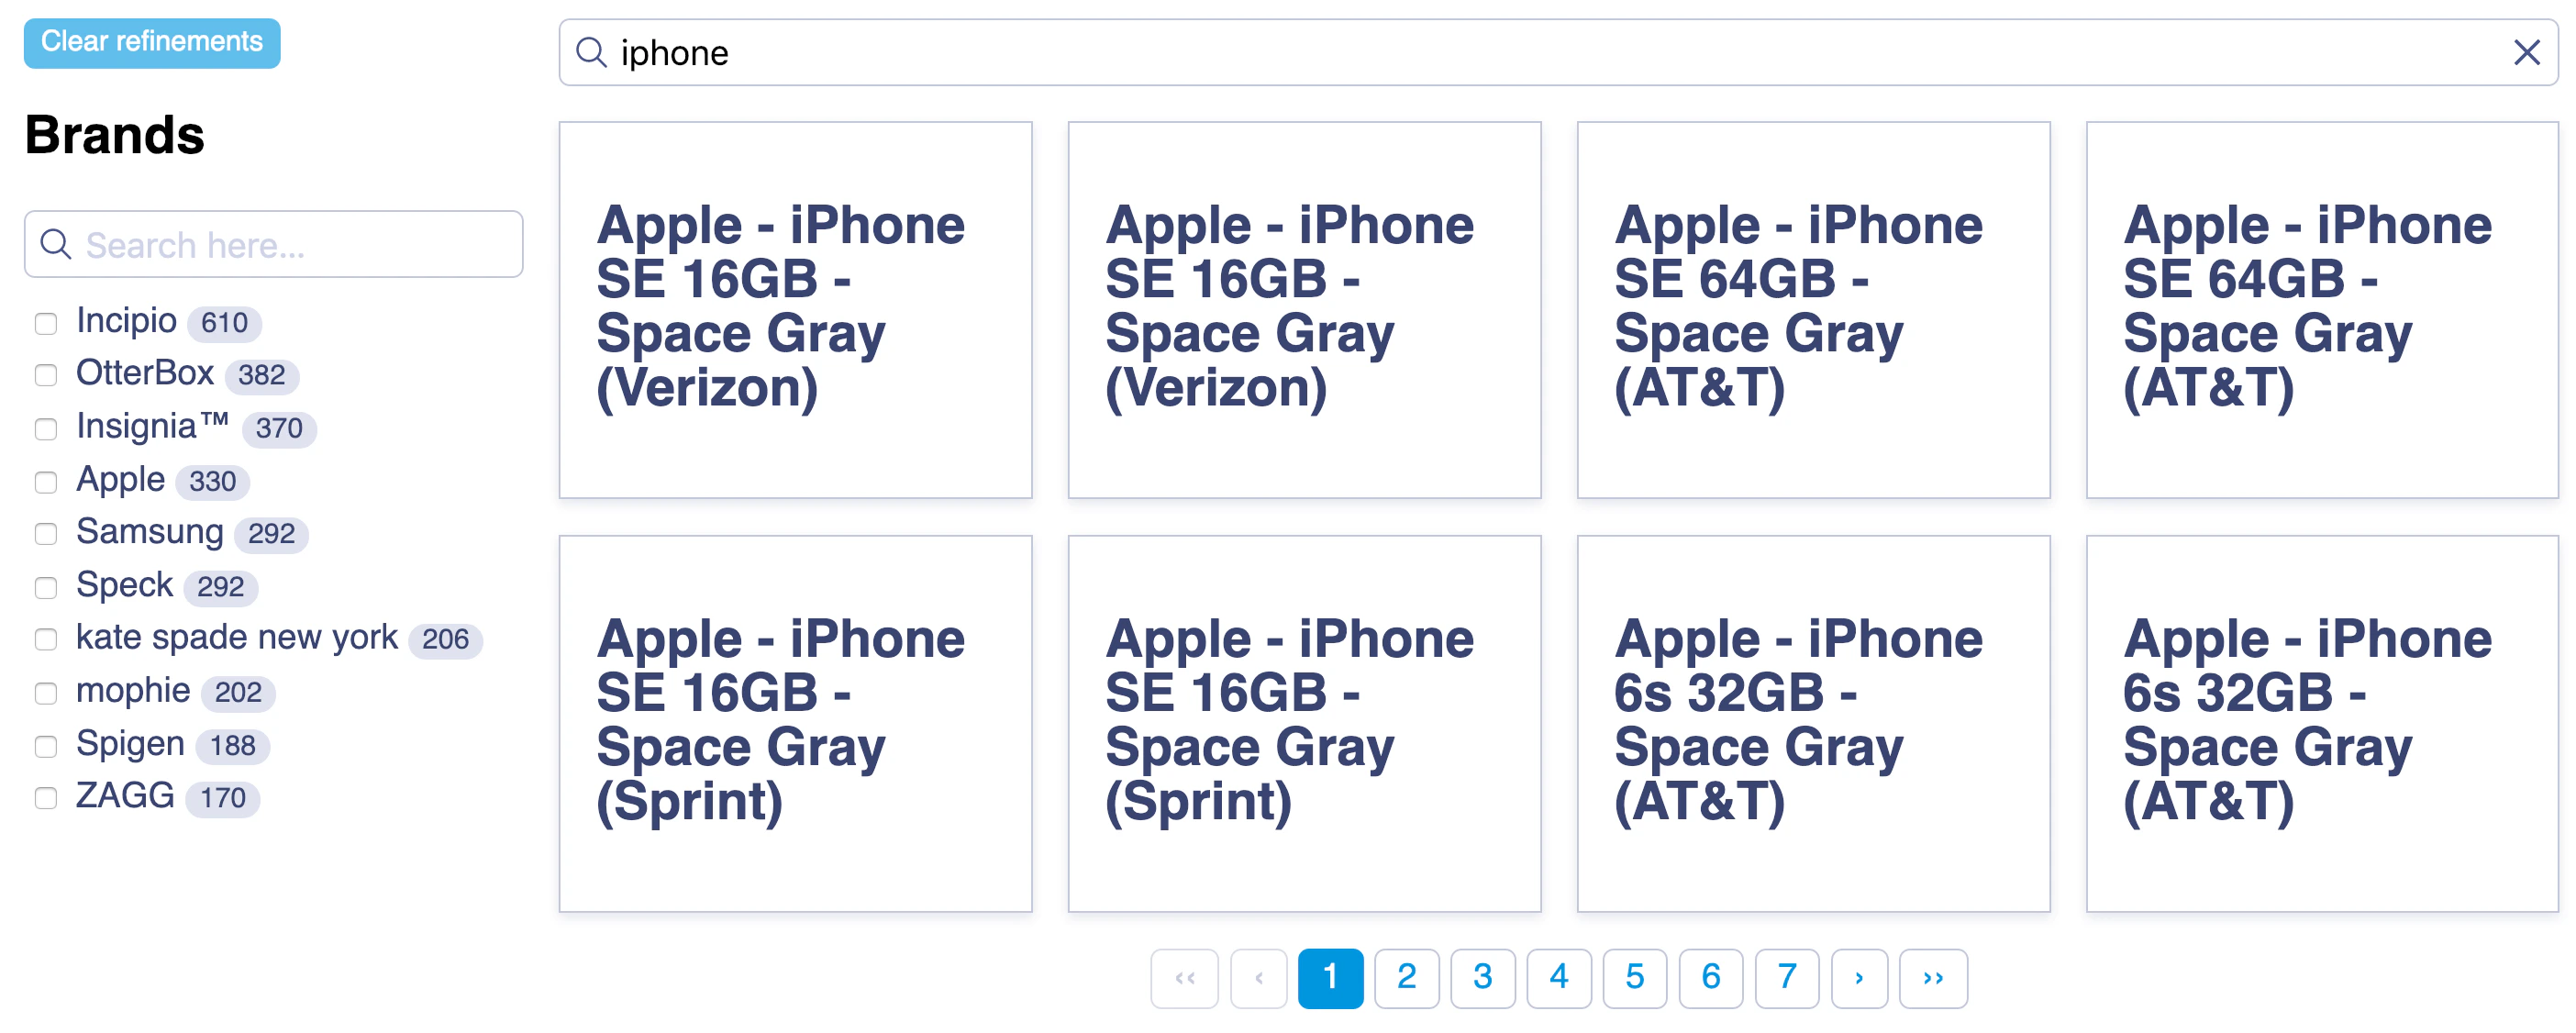
1. In your browser, after a page refresh, the layout includes a **Brands** .
Open `src/App.vue` and update it:
```vue Vue icon=code theme={"system"}
```
The widgets come with a [predefined style](/doc/guides/building-search-ui/widgets/customize-an-existing-widget/vue#style-your-widgets) but you can customize it.
1. Update the content of the style tag with the following to apply a two-column layout:
```css CSS icon=paintbrush theme={"system"}
body {
font-family: sans-serif;
padding: 1em;
}
.ais-Hits-list {
margin-top: 0;
margin-bottom: 1em;
}
.ais-InstantSearch {
display: grid;
grid-template-columns: 1fr 4fr;
grid-gap: 1em;
}
```
1. In your browser, after a page refresh, the layout includes a **Brands** .
 Open `src/App.vue` and replace the content of the `ais-hits` item slot with:
```vue Vue icon=code theme={"system"}
Open `src/App.vue` and replace the content of the `ais-hits` item slot with:
```vue Vue icon=code theme={"system"}
{{ item.name }}
![]()
{{ item.price }}
```
1. Update the content of the style tag with:
```css CSS icon=paintbrush theme={"system"}
body {
font-family: sans-serif;
padding: 1em;
}
.ais-Hits-list {
margin-top: 0;
margin-bottom: 1em;
}
.ais-InstantSearch {
display: grid;
grid-template-columns: 1fr 4fr;
grid-gap: 1em;
}
.ais-Hits-item img {
margin-right: 1em;
}
.hit-name {
margin-bottom: 0.5em;
}
.hit-description {
color: #888;
font-size: 0.8em;
margin-bottom: 0.5em;
}
```
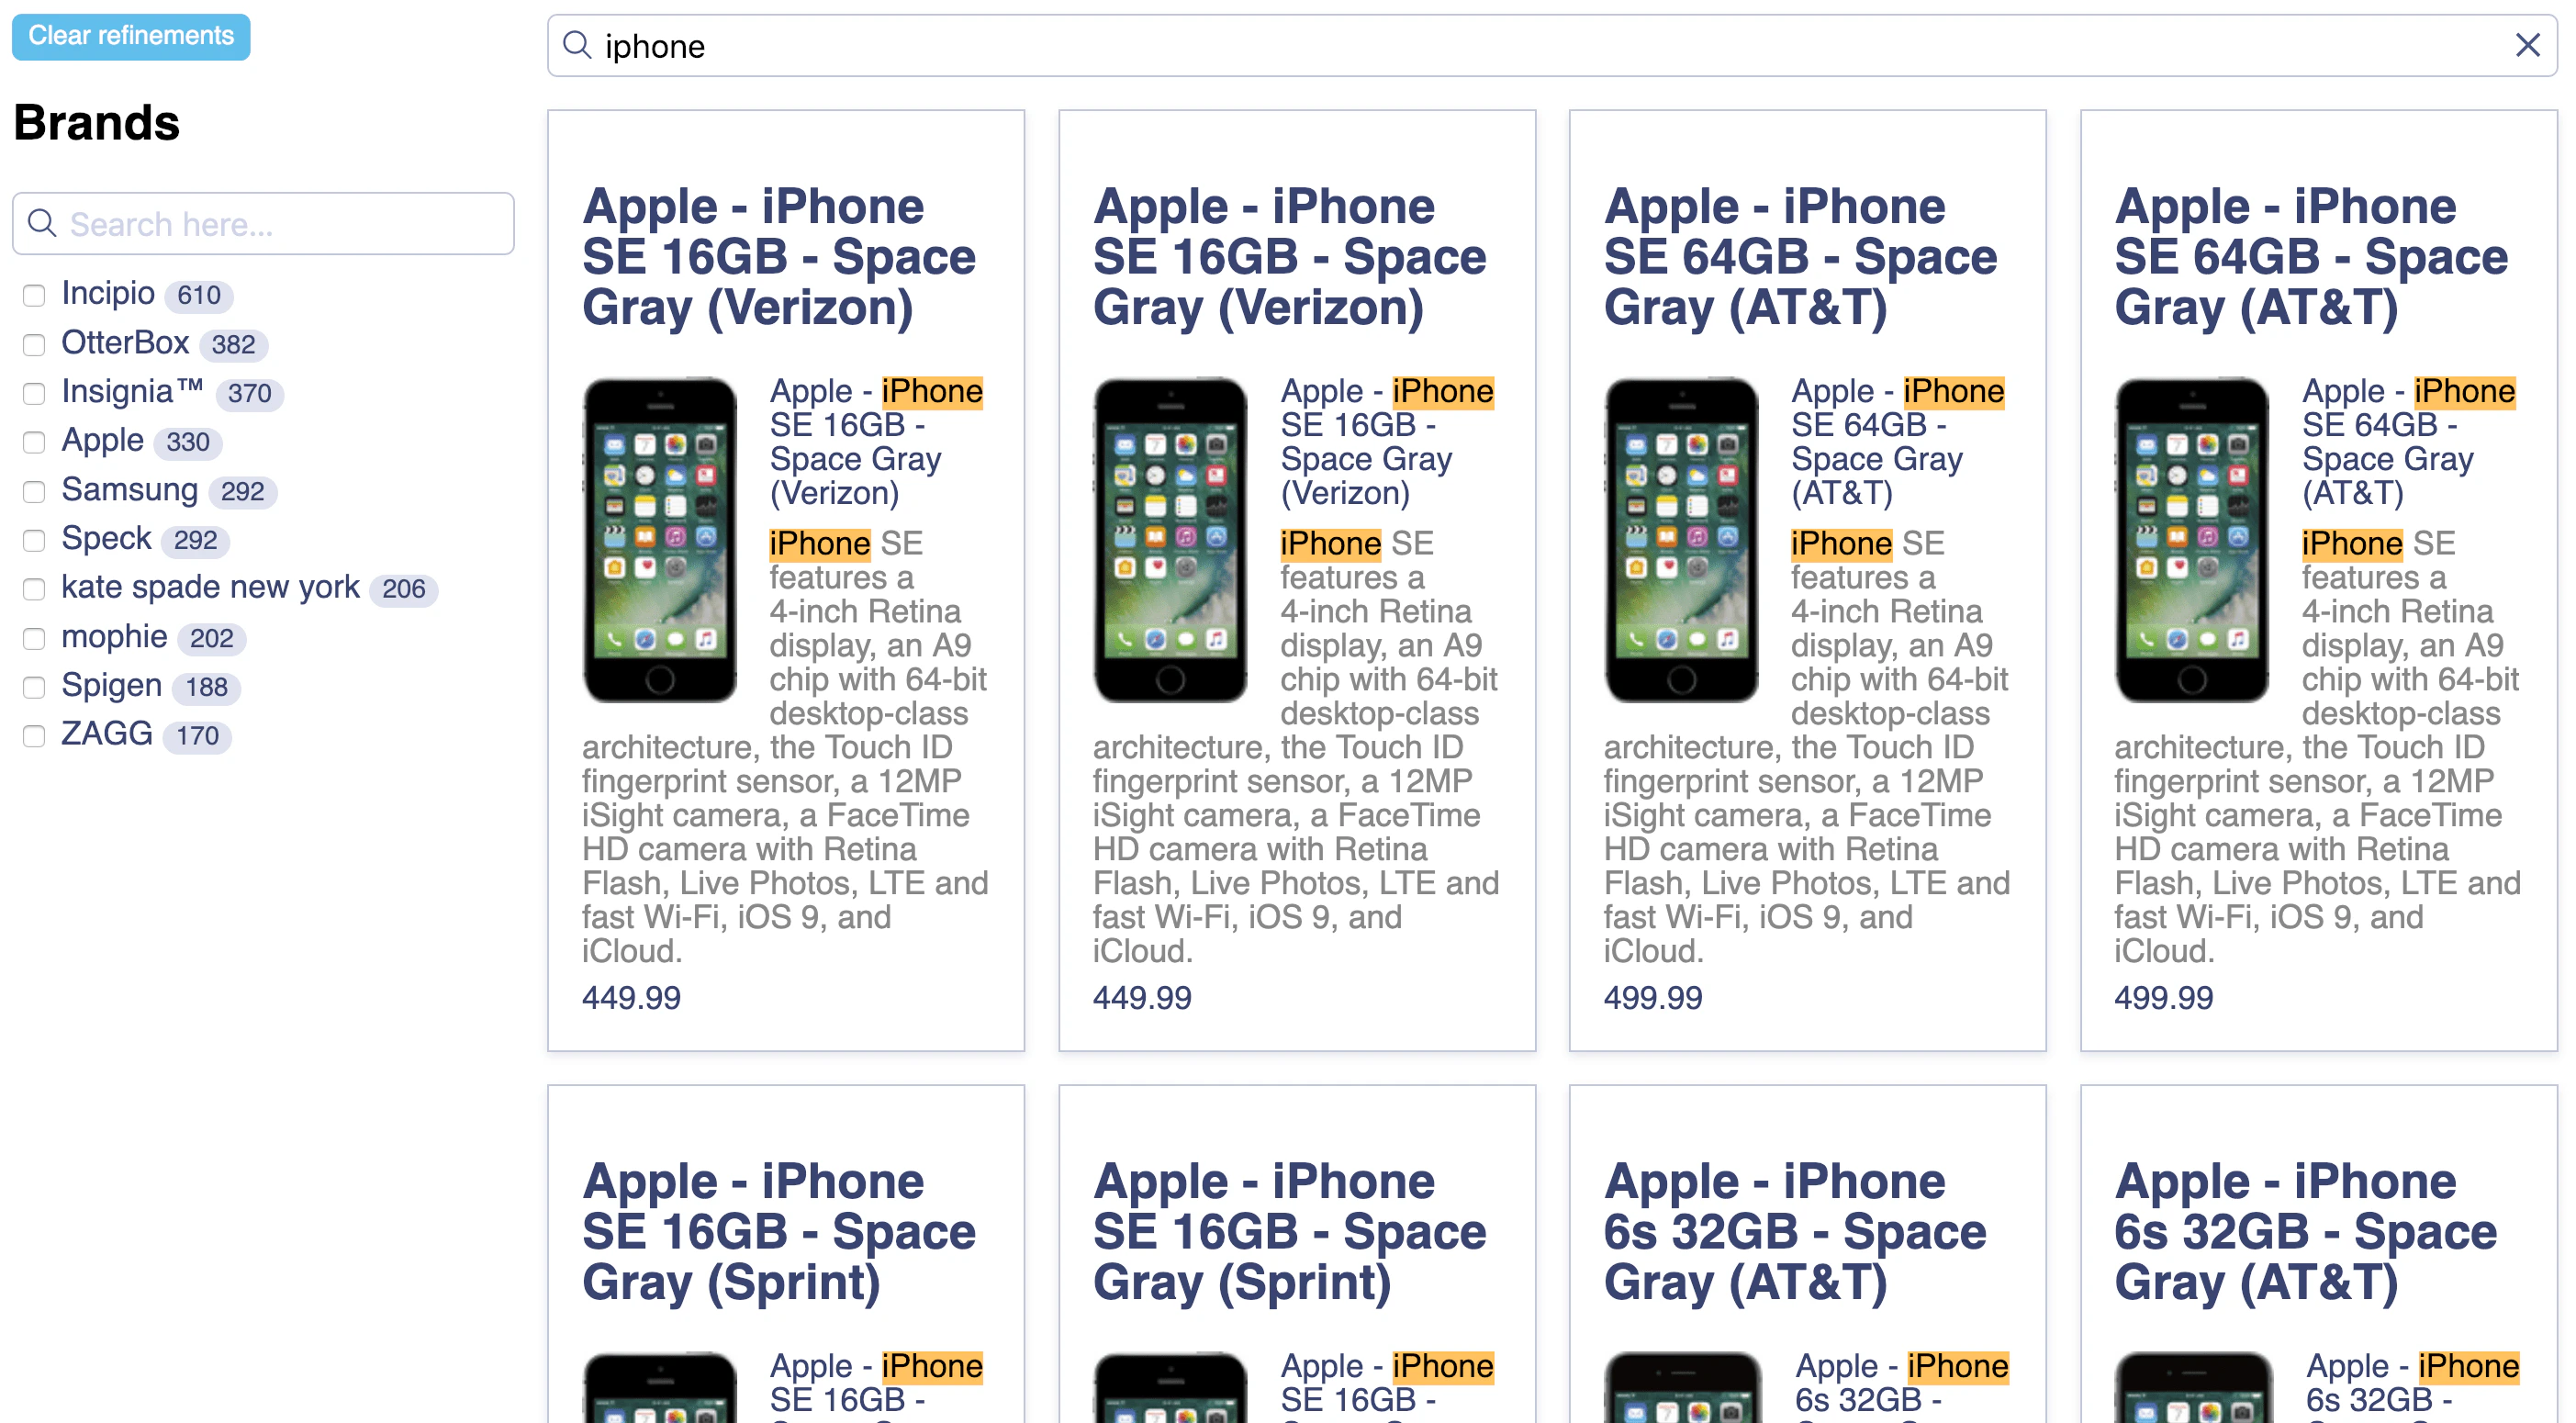
1. In your browser, after a page refresh, you'll see product images.
 ## The widgets
This quickstart uses several InstantSearch widgets:
* [`ais-instant-search`](/doc/api-reference/widgets/instantsearch/vue) is the root Vue InstantSearch component. You must wrap all other widgets inside this component.
* [`ais-search-box`](/doc/api-reference/widgets/search-box/vue) displays a search box for users to type queries into.
* [`ais-hits`](/doc/api-reference/widgets/hits/vue) displays the results from Algolia, based on the .
* [`ais-clear-refinements`](/doc/api-reference/widgets/clear-refinements/vue) displays a button that clears the current refinements.
* [`ais-refinement-list`](/doc/api-reference/widgets/refinement-list/vue) displays a list of brands that users can use to filter the search.
* [`ais-configure`](/doc/api-reference/widgets/configure/vue) passes [search parameters](/doc/api-reference/search-api-parameters). In this example, it sets [`hitsPerPage`](/doc/api-reference/api-parameters/hitsPerPage) to 8.
* [`ais-pagination`](/doc/api-reference/widgets/pagination/vue) adds navigation controls to browse through pages of results.
## Next steps
Instead of the credentials from `create-instantsearch-app`,
use your own Algolia [credentials](https://www.algolia.com/users/sign_up).
You can send your own data or [a sample dataset](https://github.com/algolia/datasets/blob/master/ecommerce/records.json) to Algolia using the JavaScript API client that comes preinstalled with `create-instantsearch-app`.
Then, configure the index with the JavaScript API client.
For example, to configure the sample dataset,
use the following code:
```js JavaScript icon="code" theme={"system"}
index
.setSettings({
searchableAttributes: [
"brand",
"name",
"categories",
"unordered(description)",
],
customRanking: ["desc(popularity)"],
attributesForFaceting: ["searchable(brand)", "type", "categories", "price"],
})
.then(() => {
// done
});
```
### Initializing your app
If you're using your app instead of `create-instantsearch-app`,
initialize it by changing the contents of `main.js` to include the Vue InstantSearch library:
```js Vue 3 theme={"system"}
import { createApp } from "vue";
import App from "./App.vue";
import InstantSearch from "vue-instantsearch/vue3/es";
const app = createApp(App);
app.use(InstantSearch);
app.mount("#app");
```
```js Vue 2 theme={"system"}
import Vue from "vue";
import App from "./App.vue";
import InstantSearch from "vue-instantsearch";
Vue.use(InstantSearch);
new Vue({
el: "#app",
render: (h) => h(App),
});
```
## See also
* [What is InstantSearch?](/doc/guides/building-search-ui/what-is-instantsearch/vue)
* [Send and update your data](/doc/guides/sending-and-managing-data/send-and-update-your-data)
* [Send click and conversion events](/doc/guides/building-search-ui/events/vue)
* [Customize an existing widget](/doc/guides/building-search-ui/widgets/customize-an-existing-widget/vue)
## The widgets
This quickstart uses several InstantSearch widgets:
* [`ais-instant-search`](/doc/api-reference/widgets/instantsearch/vue) is the root Vue InstantSearch component. You must wrap all other widgets inside this component.
* [`ais-search-box`](/doc/api-reference/widgets/search-box/vue) displays a search box for users to type queries into.
* [`ais-hits`](/doc/api-reference/widgets/hits/vue) displays the results from Algolia, based on the .
* [`ais-clear-refinements`](/doc/api-reference/widgets/clear-refinements/vue) displays a button that clears the current refinements.
* [`ais-refinement-list`](/doc/api-reference/widgets/refinement-list/vue) displays a list of brands that users can use to filter the search.
* [`ais-configure`](/doc/api-reference/widgets/configure/vue) passes [search parameters](/doc/api-reference/search-api-parameters). In this example, it sets [`hitsPerPage`](/doc/api-reference/api-parameters/hitsPerPage) to 8.
* [`ais-pagination`](/doc/api-reference/widgets/pagination/vue) adds navigation controls to browse through pages of results.
## Next steps
Instead of the credentials from `create-instantsearch-app`,
use your own Algolia [credentials](https://www.algolia.com/users/sign_up).
You can send your own data or [a sample dataset](https://github.com/algolia/datasets/blob/master/ecommerce/records.json) to Algolia using the JavaScript API client that comes preinstalled with `create-instantsearch-app`.
Then, configure the index with the JavaScript API client.
For example, to configure the sample dataset,
use the following code:
```js JavaScript icon="code" theme={"system"}
index
.setSettings({
searchableAttributes: [
"brand",
"name",
"categories",
"unordered(description)",
],
customRanking: ["desc(popularity)"],
attributesForFaceting: ["searchable(brand)", "type", "categories", "price"],
})
.then(() => {
// done
});
```
### Initializing your app
If you're using your app instead of `create-instantsearch-app`,
initialize it by changing the contents of `main.js` to include the Vue InstantSearch library:
```js Vue 3 theme={"system"}
import { createApp } from "vue";
import App from "./App.vue";
import InstantSearch from "vue-instantsearch/vue3/es";
const app = createApp(App);
app.use(InstantSearch);
app.mount("#app");
```
```js Vue 2 theme={"system"}
import Vue from "vue";
import App from "./App.vue";
import InstantSearch from "vue-instantsearch";
Vue.use(InstantSearch);
new Vue({
el: "#app",
render: (h) => h(App),
});
```
## See also
* [What is InstantSearch?](/doc/guides/building-search-ui/what-is-instantsearch/vue)
* [Send and update your data](/doc/guides/sending-and-managing-data/send-and-update-your-data)
* [Send click and conversion events](/doc/guides/building-search-ui/events/vue)
* [Customize an existing widget](/doc/guides/building-search-ui/widgets/customize-an-existing-widget/vue)