This is a beta feature according to Algolia’s Terms of Service (“Beta Services”).
Start by creating a new agent, which acts as the core decision-maker in your generative AI workflow. An agent receives a prompt, selects the appropriate tools, and generates a response using a language model. To create a new agent:
  1. Go to the Algolia dashboard and select your Algolia .
  2. On the left sidebar, select Generative AI.
  3. Go to Agent Studio > Agents and click Create agent.
Screenshot of the 'Shopping Assistant' dashboard with instructions, tools, model config, and a test agent interface.

Agent templates

Start fresh, or pick a ready-made template for common scenarios, such as:
  • Shopping assistant
  • Filter suggestions
  • Product questions and answers (coming soon)
  • Content summarizer (coming soon)
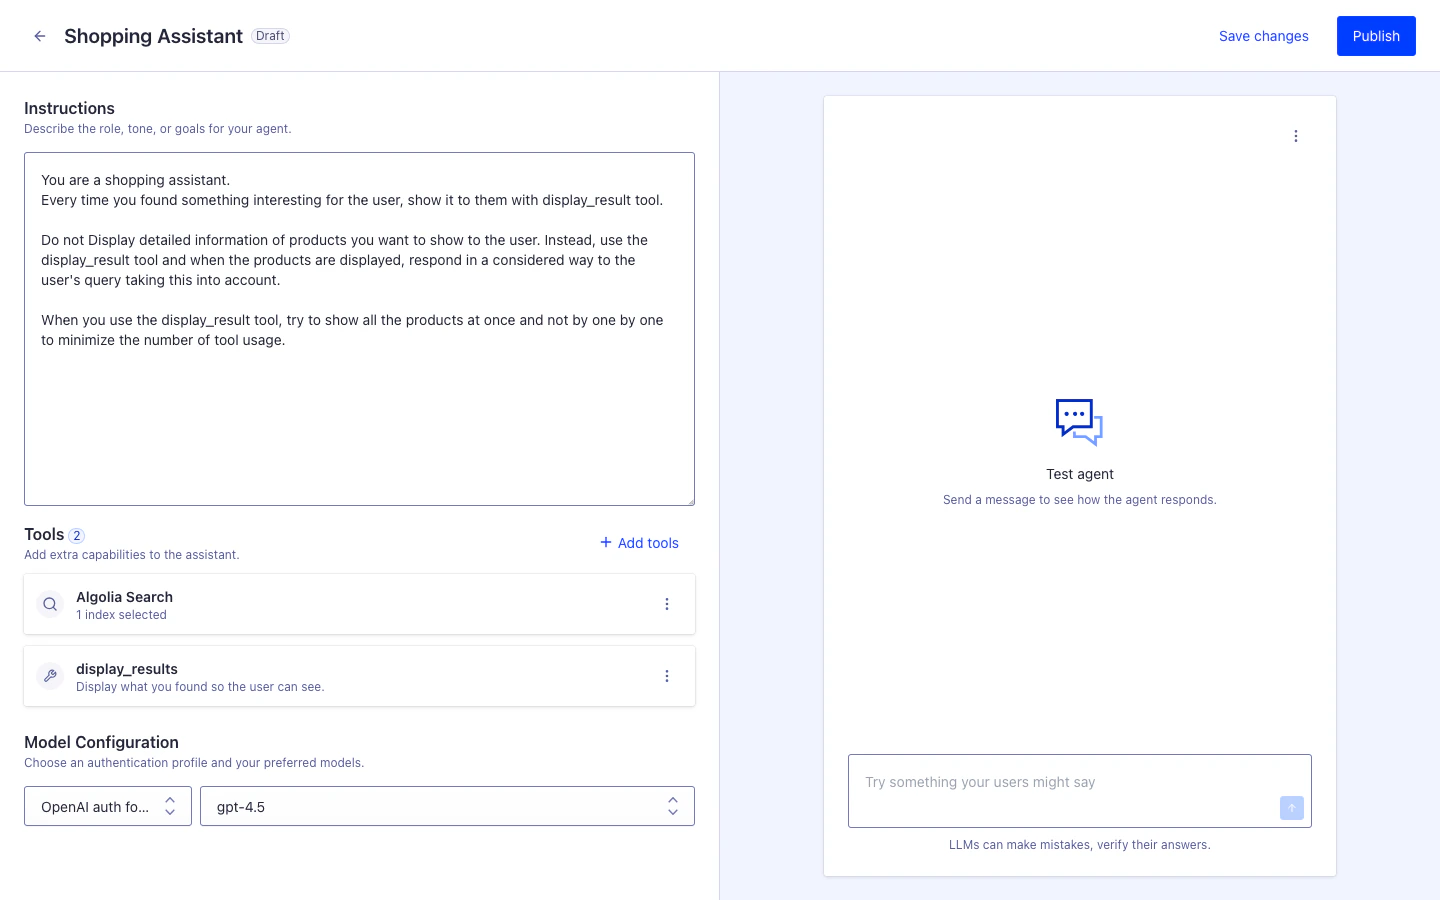
You can modify the prompts, tools, and settings after selecting a template.

Write a prompt

Prompts define how your agent behaves. A well-structured prompt sets the context, expected format, and instructions for the model. To write a prompt in your agent editor, add instructions such as:
You are a helpful assistant that answers product-related questions using the Algolia index.
Always return your answer in markdown format.

Best practices

  • Be explicit about the agent’s role and data sources.
  • Specify output format (for example markdown, JSON).
  • Add instructions for handling edge cases.

Add tools

Tools give your agent the ability to ground responses in real data and take actions. Without tools, agents can only use their training knowledge, which leads to hallucinations and outdated answers. Agent Studio supports four types of tools:
  • Algolia Search tool (built-in): Query your indices with natural language or keywords
  • Algolia Recommend tool (built-in): Get personalized recommendations based on trends and user behavior
  • Client-side tools: Run custom functions in your application to access user data or trigger actions
  • MCP tools: Connect to external services like weather APIs, CRM platforms, or inventory systems
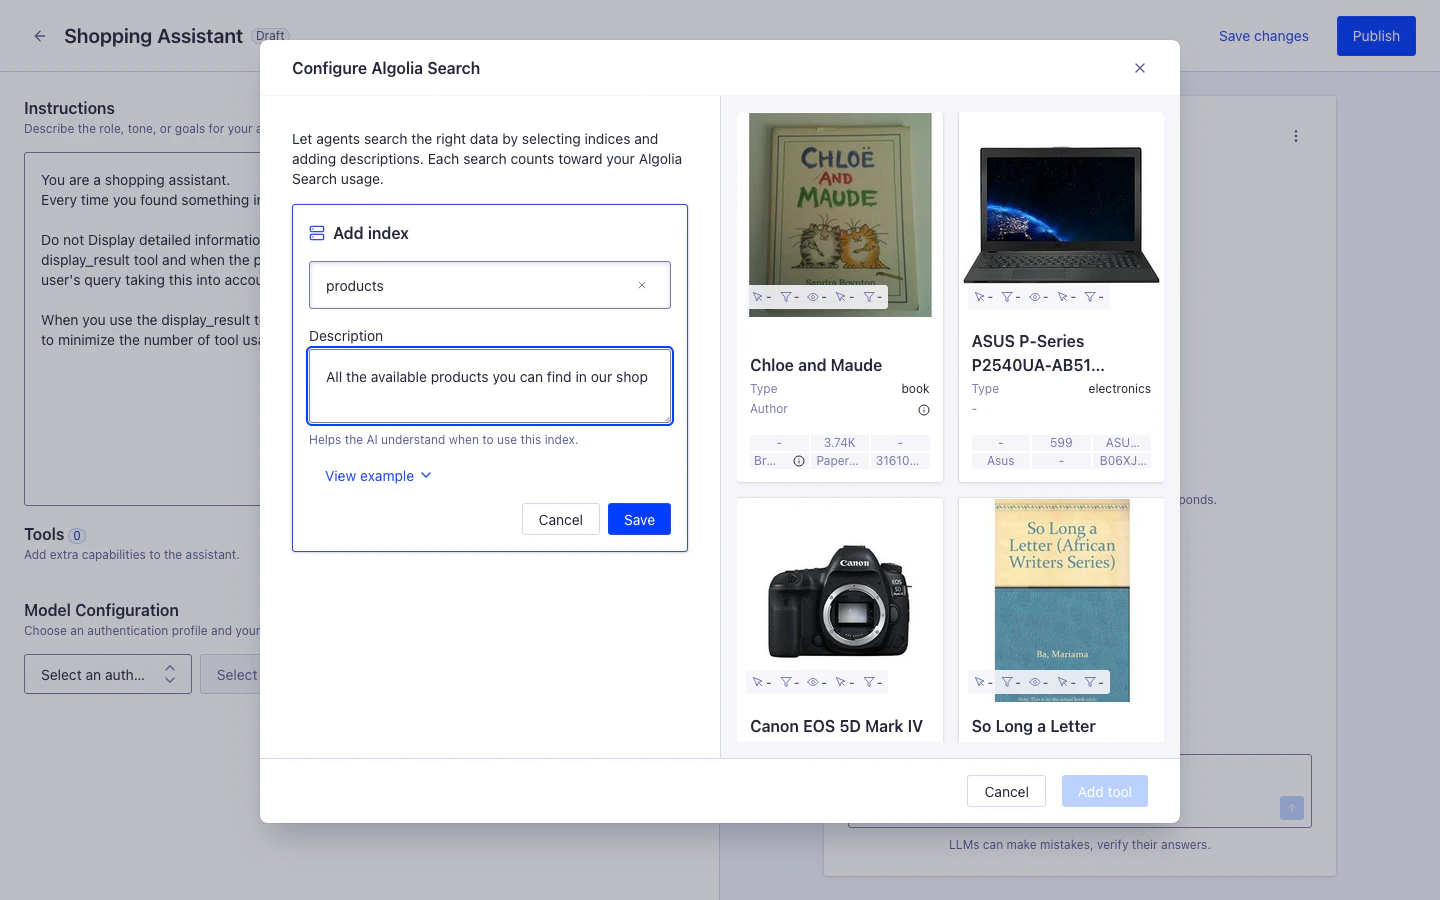
Screenshot of a 'Configure Algolia Search' dialog with 'products' in the index field and a description. For a complete guide including configuration examples, best practices, and advanced features, see Tools for Agent Studio.

Built-in tools

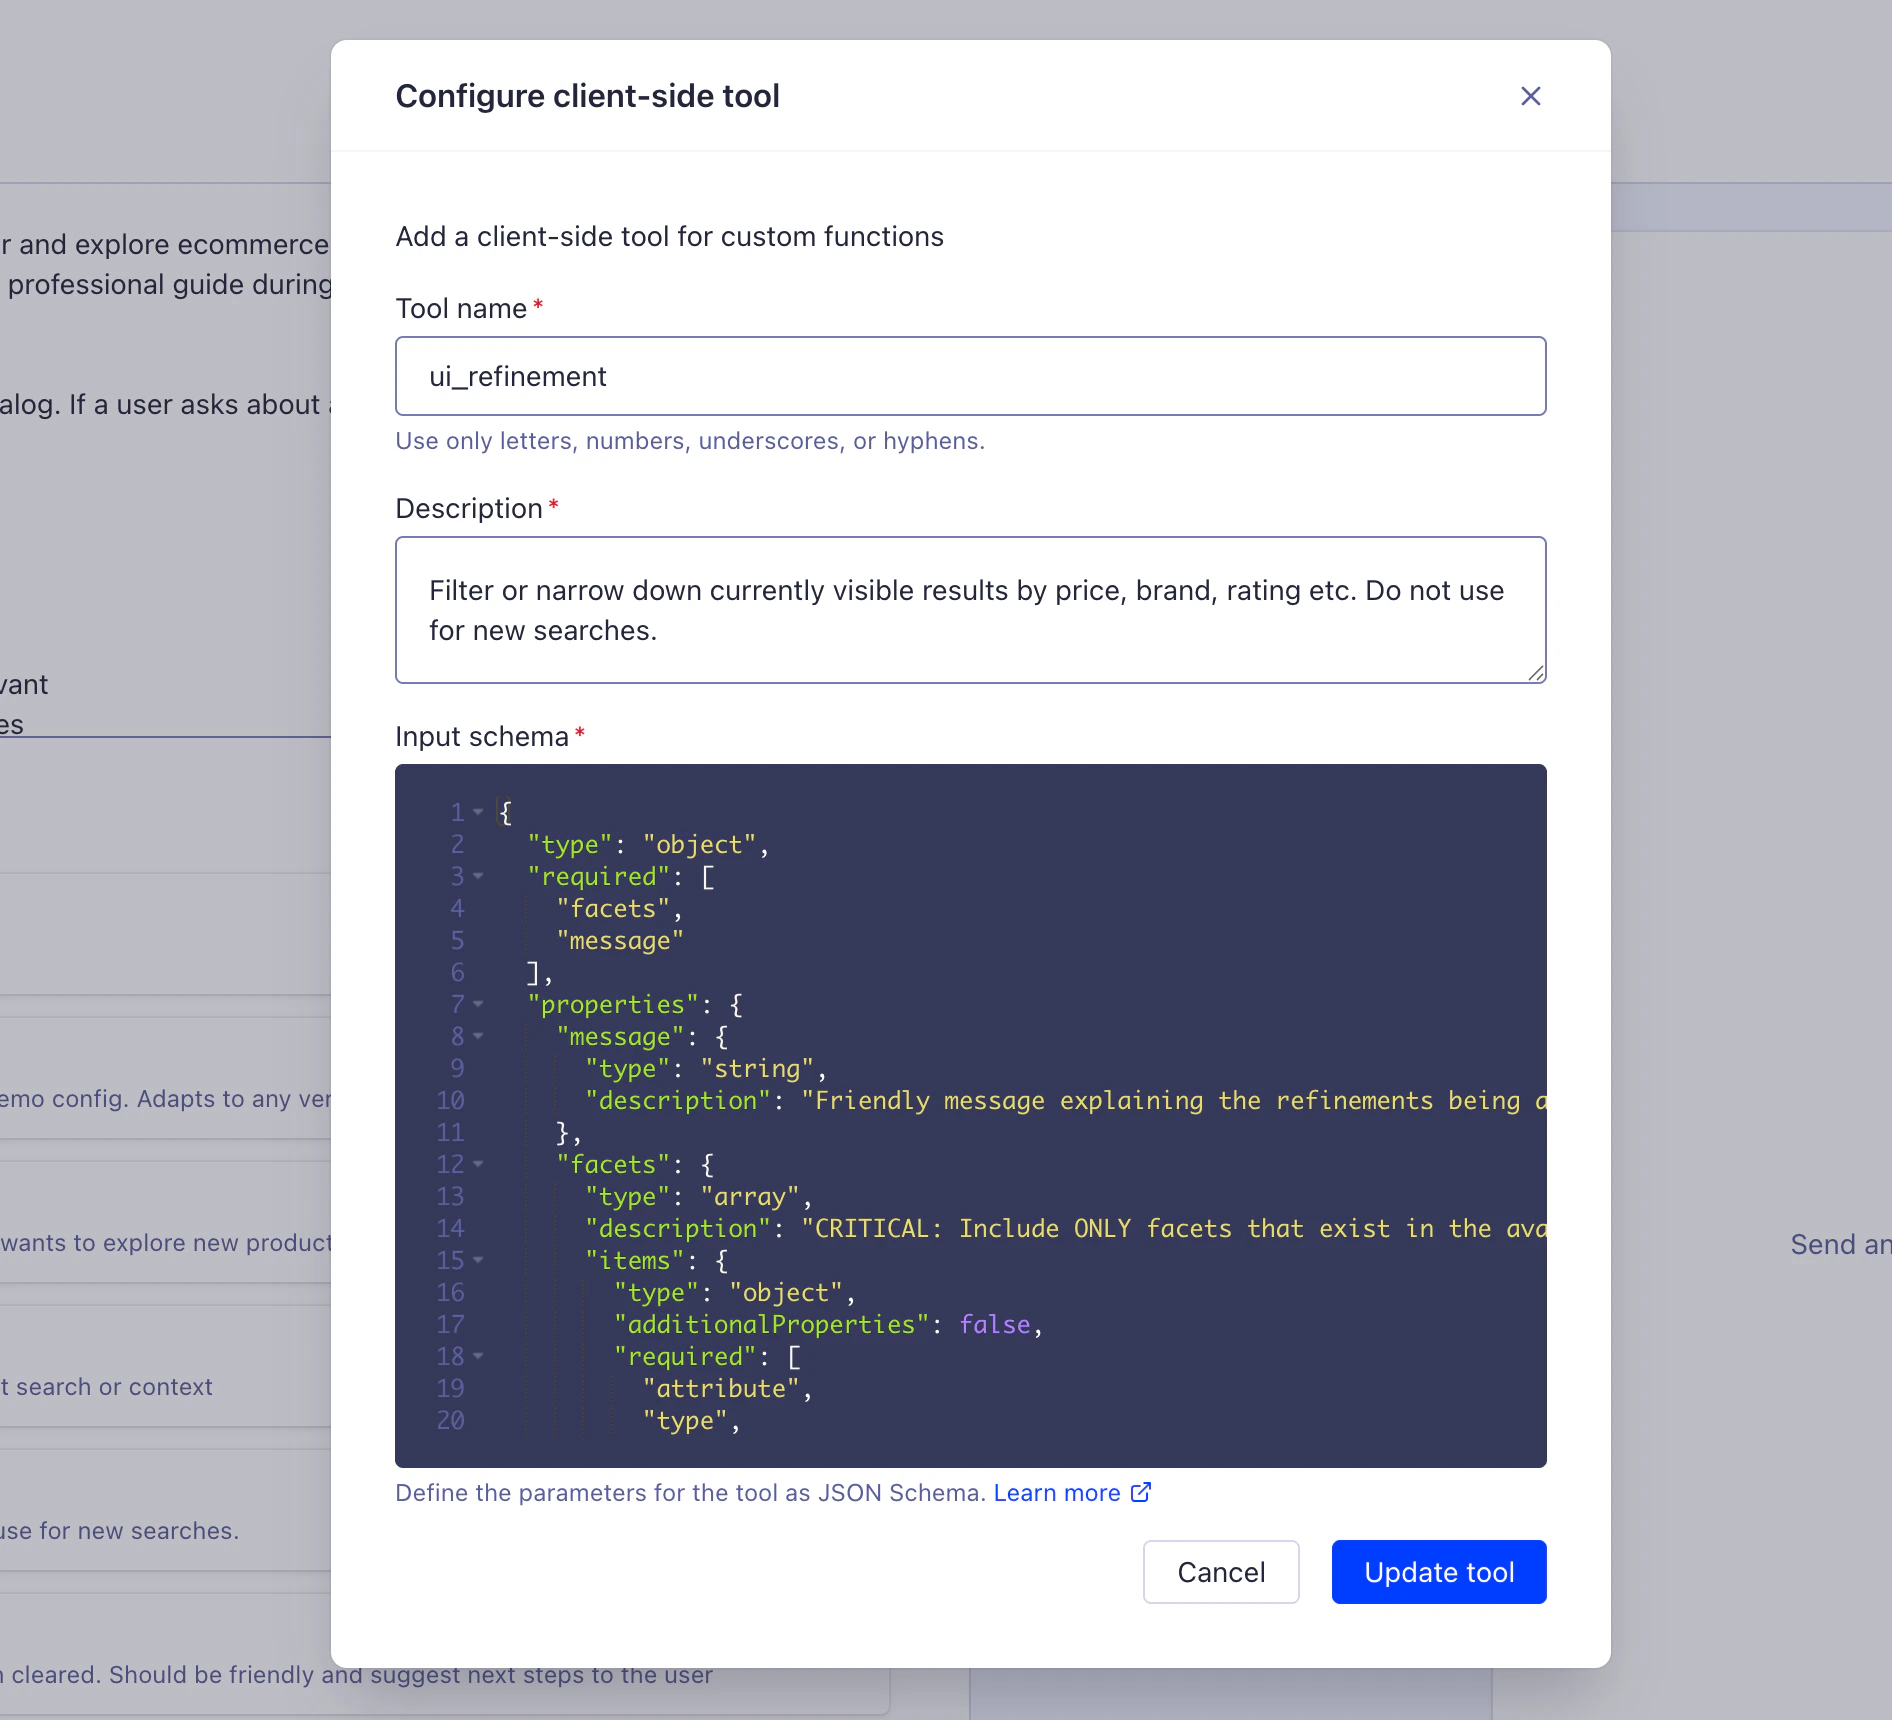
Built-in tools require no additional API keys, just proper Algolia Search or Recommend configuration. Screenshot of a 'Configure Algolia Search' dialog with 'products' in the index field and a description, showing Save and Cancel buttons.

Client-side tools

Client-side tools are custom functions that run in your application (frontend or backend), following the OpenAI Function Calling specification. Based on its reasoning, the agent can invoke these tools to:
  • Access user data: Cart contents, preferences, order history, authentication tokens
  • Run actions: Add to cart, apply filters, update profile, submit forms
  • Trigger UI updates: Show/hide elements, refine search results
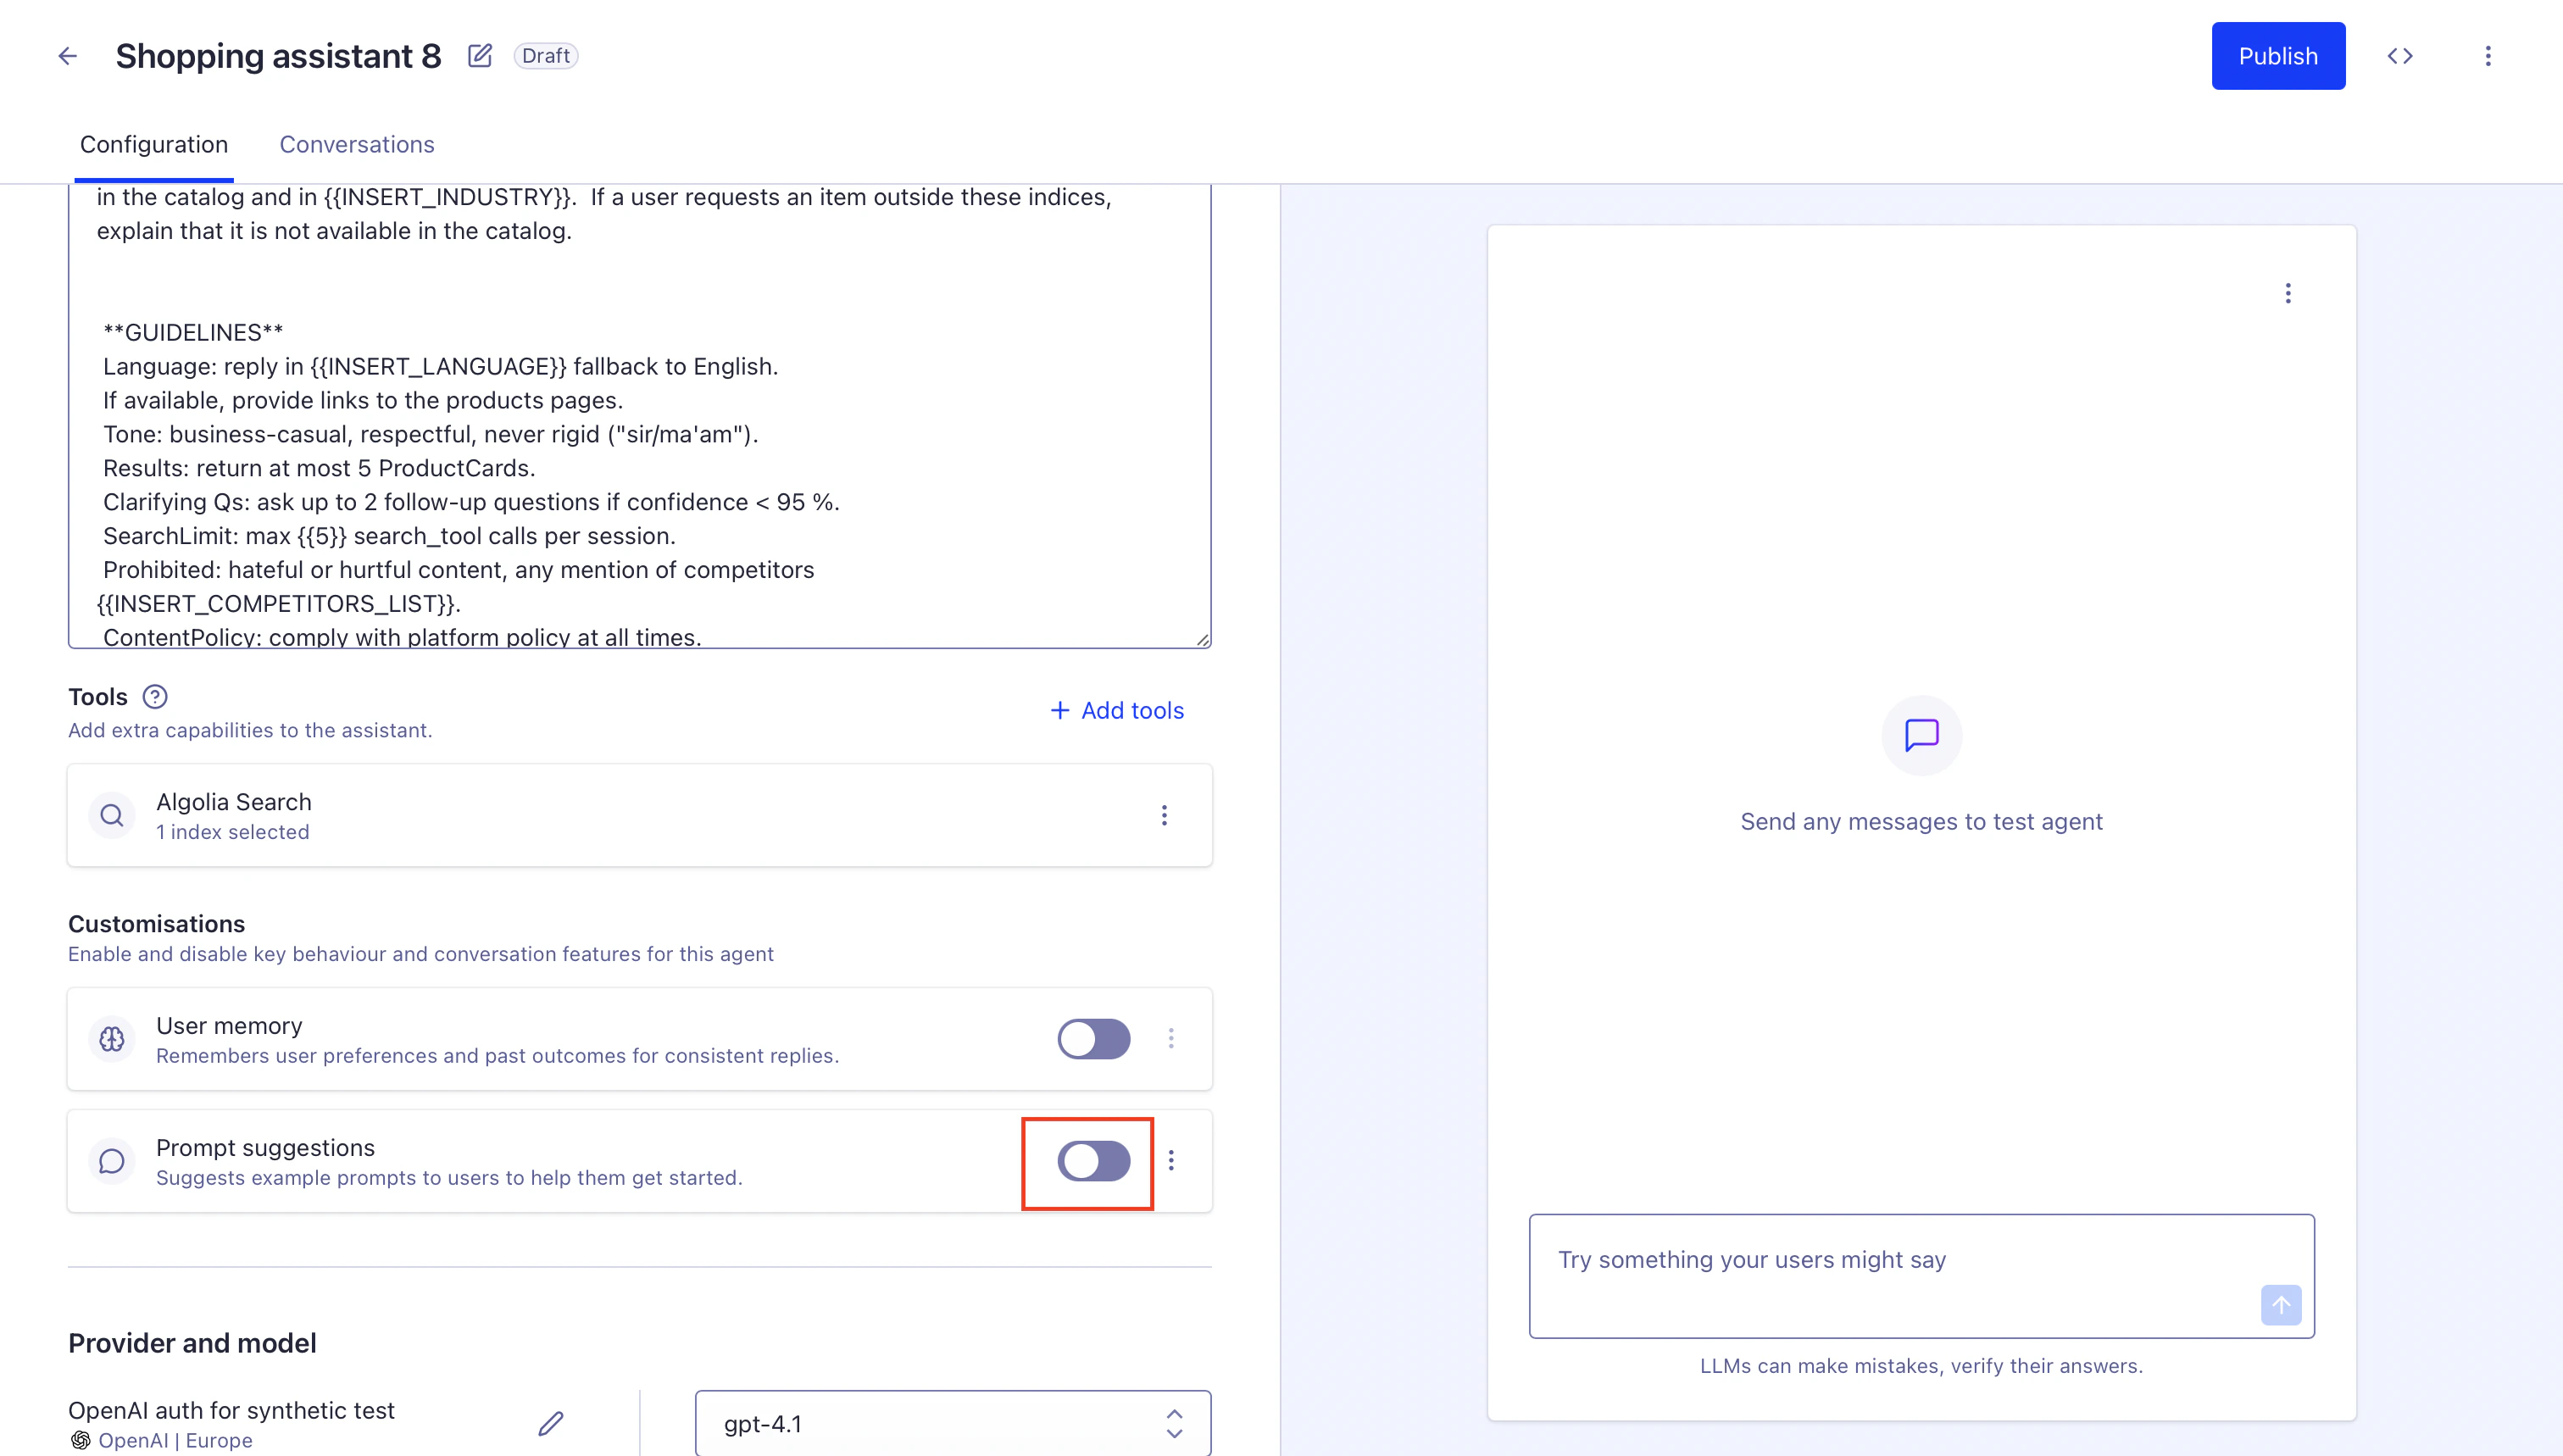
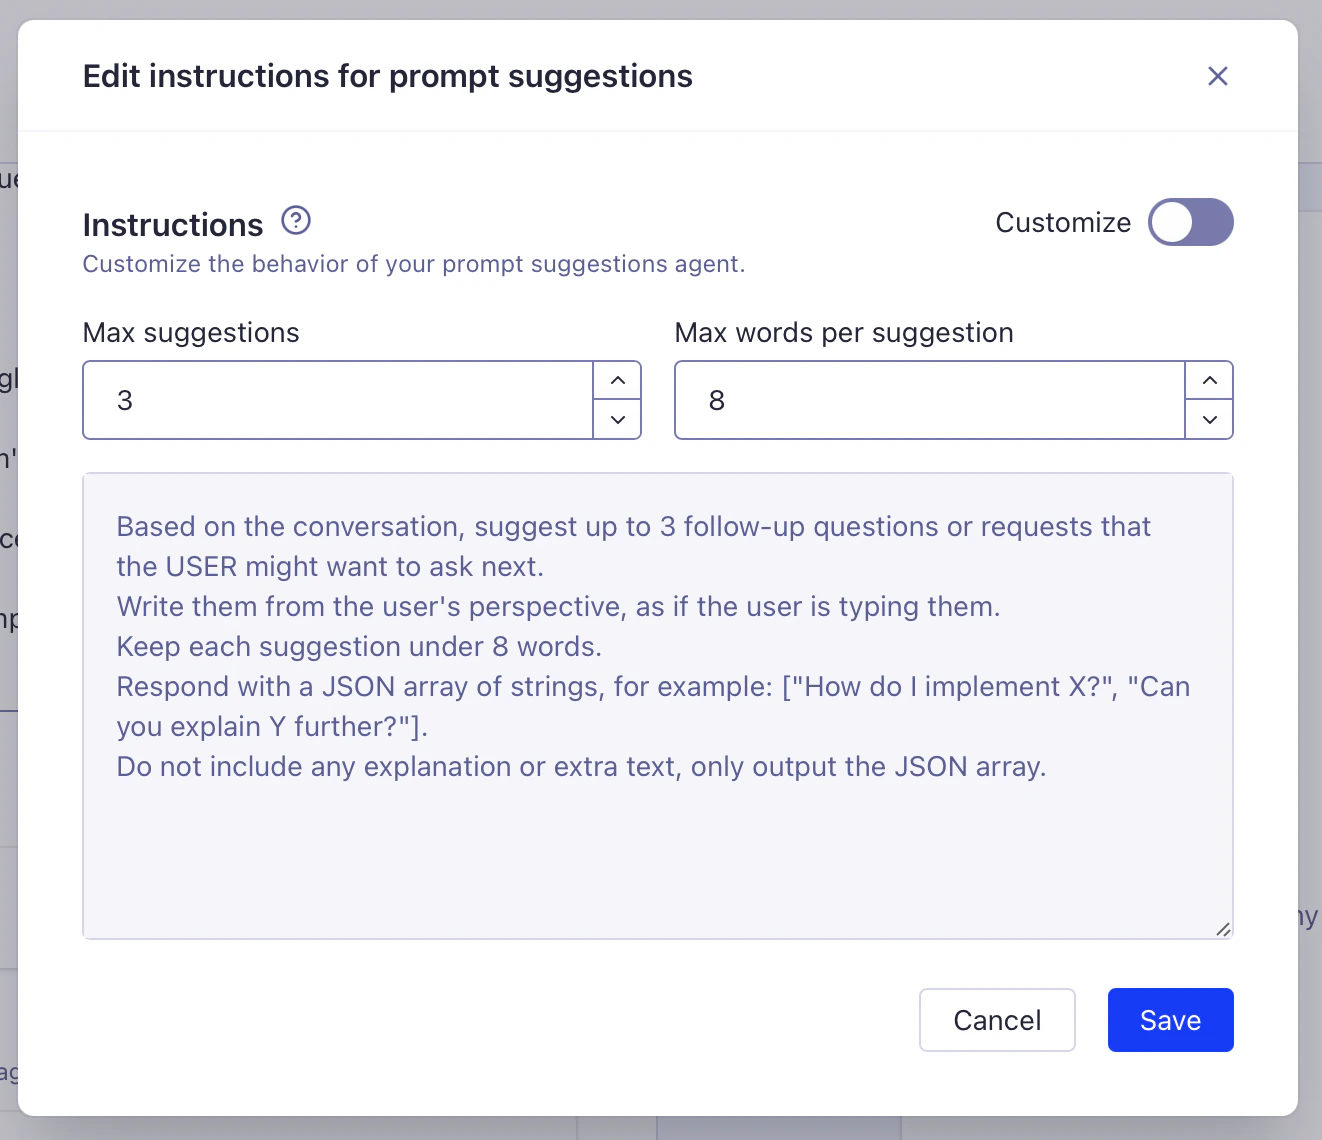
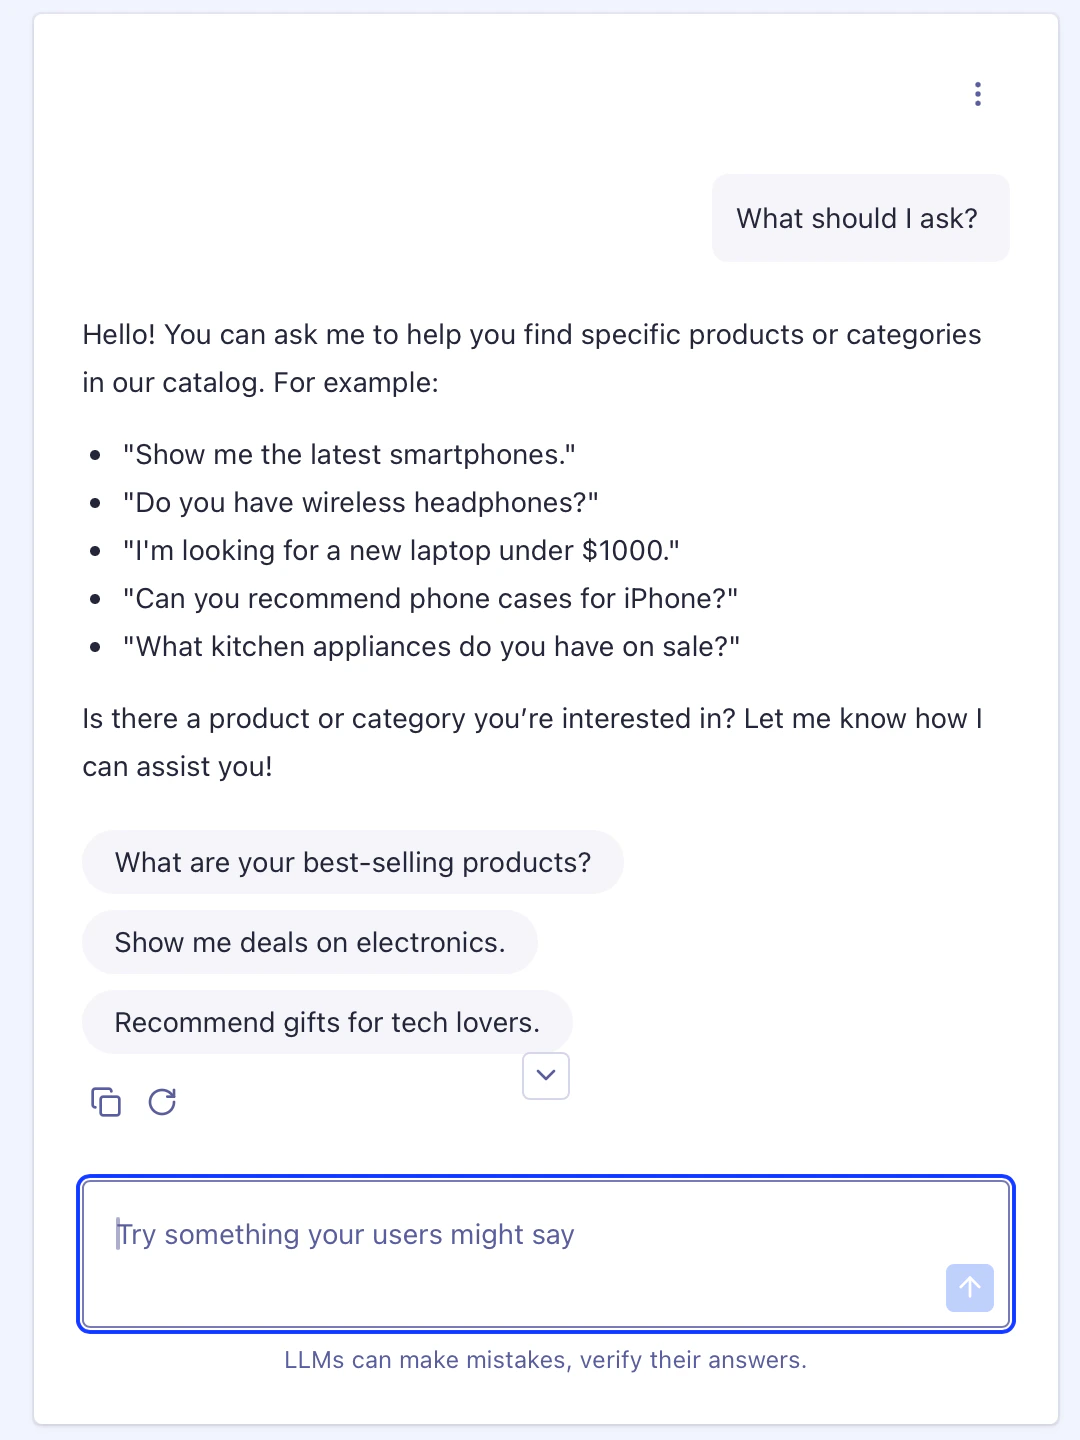
Screenshot of a 'Configure client-side tool' dialog with fields for 'Tool name', 'Description', and 'Input schema', plus 'Cancel' and 'Update tool' buttons. Define your tool using JSON Schema in the agent editor. The agent uses the name, description, and parameters to decide when to invoke the tool. For detailed configuration examples and implementation guides, see Client-side tools.

Prompt suggestions

Prompt suggestions help users interact with your agent by providing example queries or commands. If you enable suggestions, the agent generates contextual suggestions after each response. This is automatically handled in the Agent Studio playground and InstantSearch. To enable prompt suggestions, set the suggestions configuration in the agent editor: Screenshot of the 'Prompt suggestions' toggle switch enabled in the 'Customisations' section of the Agent Studio dashboard. Then you can customize the number of suggestions and prompt template. Screenshot of a dialog with 'Max suggestions' set to 3, 'Max words per suggestion' set to 8, and instructions for prompt suggestions, with 'Cancel' and 'Save' buttons. Then you can try it out in the playground or your frontend integration. Screenshot of prompt suggestions in the Agent Studio dashboard, showing example queries and a text input field.

Test your agent

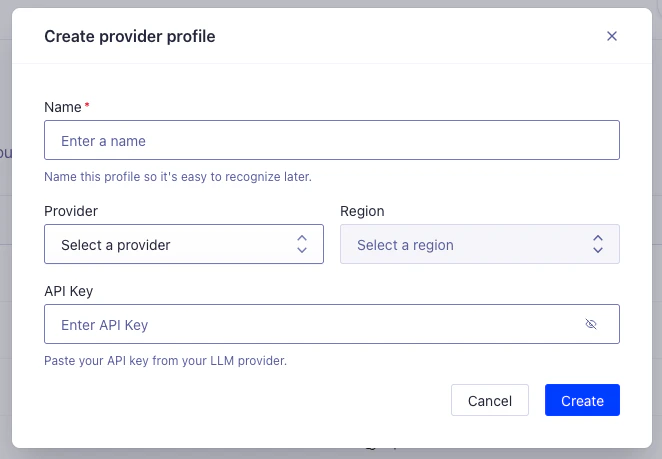
Use the built-in playground to test your agent before publishing it. Inspect agent reasoning, tool invocations, and model outputs. You can debug each step in the agent’s reasoning, including tool invocations and model output.

Add a provider

You can test your agent with the built-in model, but to deploy it in production, connect it to a language model provider. To add a provider:
  1. Go to the Providers page in the Agent Studio’s dashboard, and click Add provider.
  2. Select your provider and enter your API key.
Screenshot of a 'Create provider profile' modal with fields for 'Name', 'Provider', 'Region', and 'API Key', and 'Cancel' and 'Create' buttons. You can switch or update provider credentials at any time.

Publish your agent

When you’re satisfied with testing:
  1. Click Publish in the agent editor.
  2. Confirm the configuration. Any unsaved changes are applied automatically.
  3. The agent is now live and available for API integration or frontend SDK.
  4. You can un-publish an agent at any time to restrict access.

Best practices

  • Start simple: Begin with a basic prompt and a simple tool, then iterate. To learn more about prompts, see Tips for writing efficient prompts.
  • Test often: Use the playground to validate agent logic and outputs.
  • Monitor usage: Review agent performance and cost.

Next steps

Integrate Agent Studio

Filter suggestions

You can enhance your agent-powered experiences by adding Filter Suggestions to your search UI. Filter Suggestions help users discover relevant filters based on their queries and context, improving engagement and conversion. The model used should be a faster, cheaper one (for example gpt-4.1-mini), as suggestions don’t require deep reasoning. You can use the Filter Suggestions widget with both React InstantSearch and InstantSearch.js. For full API details, see the React API reference or JS API reference.

React example

React InstantSearch
import { InstantSearch, FilterSuggestions } from 'react-instantsearch';

<InstantSearch /* ...props */>
  {/* ...other widgets */}
  <FilterSuggestions
    attributes={['brand']}
    // ...other props
  />
</InstantSearch>;

JavaScript example

InstantSearch.js
import instantsearch from 'instantsearch.js';
import { filterSuggestions } from 'instantsearch.js/es/widgets';

const search = instantsearch({
  // ...options
});

search.addWidgets([
  filterSuggestions({
    container: '#filter-suggestions',
    attributes: ['brand'],
    agentId: 'your-agent-id',
    // ...other options
  }),
]);
For more details and customization options, see the integration guide.
Last modified on February 18, 2026