Before you begin
This quickstart assumes basic Vue knowledge. It includes all the code, data, and credentials you need.Quickstart
In this quickstart, you’ll add an Algolia search interface to some starter code. The code:- Displays and formats a search box and results
- Uses InstantSearch’s pre-built UI components (widgets) to filter results
Open CodeSandbox
Run and edit the Vue InstantSearch quickstart example in CodeSandbox.
Explore source code
Browse the source for the Vue InstantSearch quickstart example on GitHub.
1
Add starter code
To generate some starter code, use the This command creates a folder structure on your machine:
create-instantsearch-app tool.
It provides the data, all necessary code, and predefined credentials ( and ).In a terminal, paste:Command line
2
Add the search UI
Open
src/App.vue and replace the whole file with the following:Vue
3
Run the project
-
In your terminal, type:
Command line
-
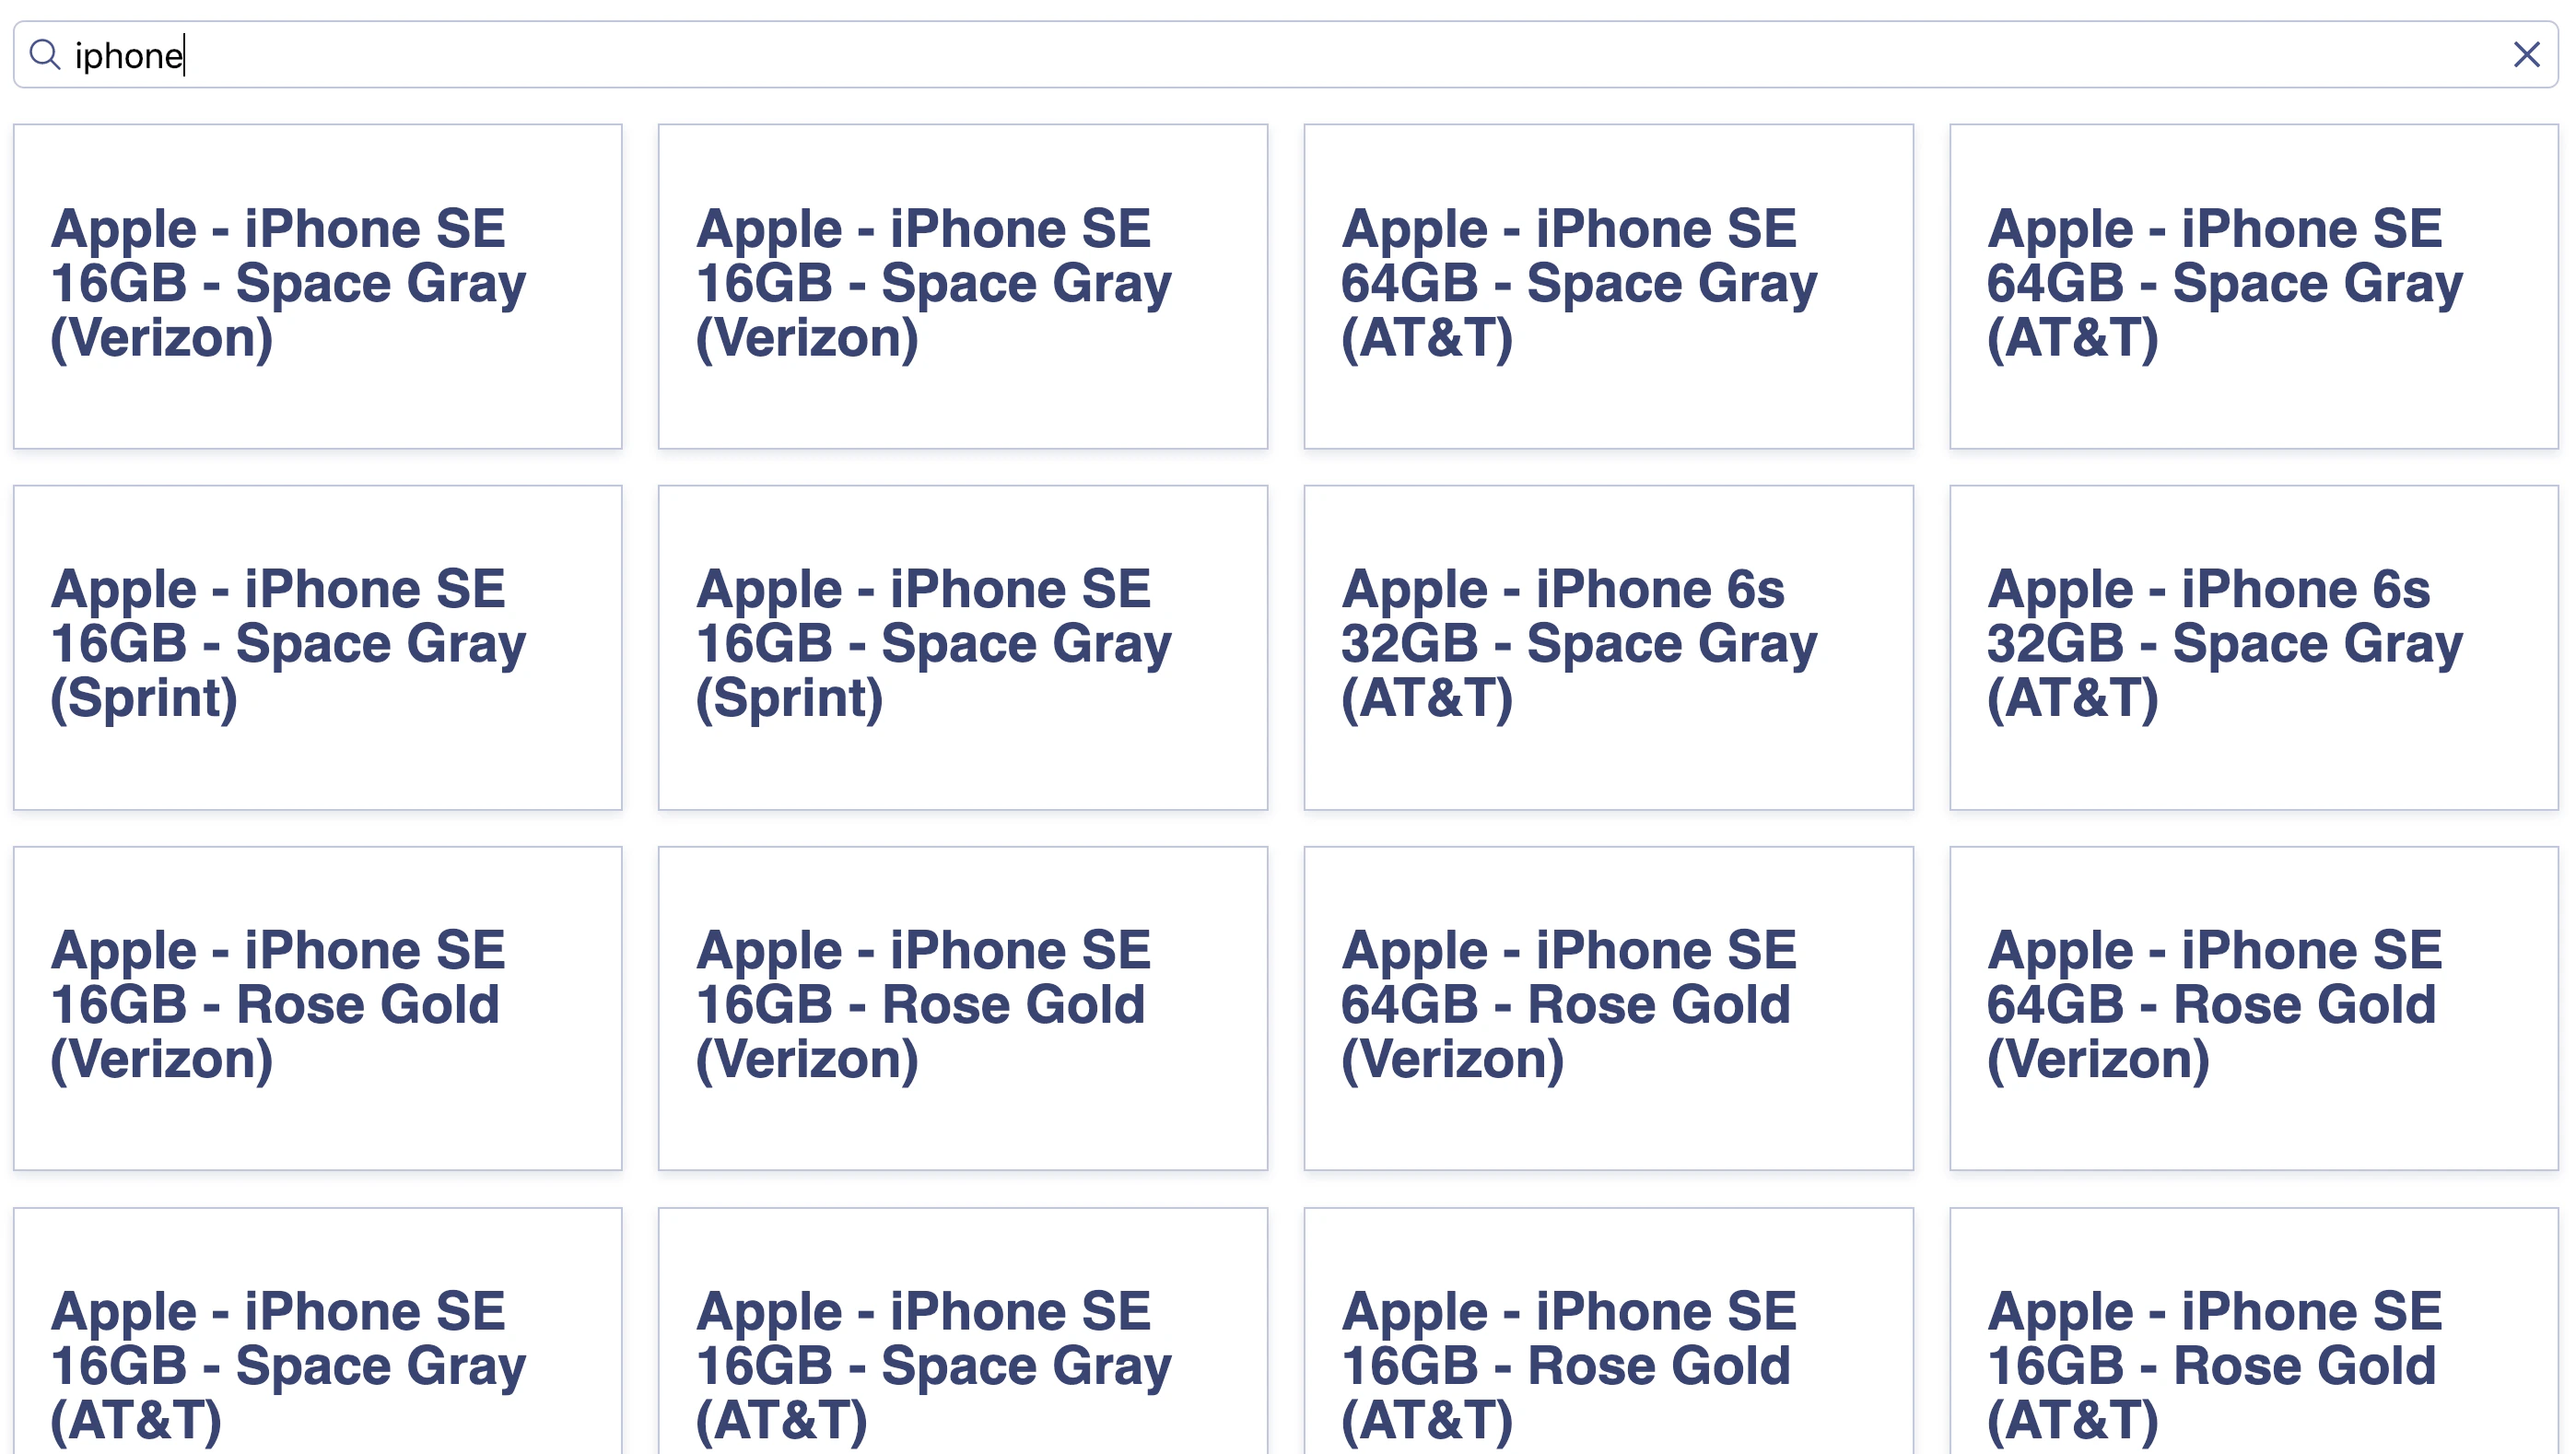
Open your browser and go to http://localhost:3000. The app displays the search box and results.
4
Add filters and settings
Open
src/App.vue and update it:Vue
5
Create a two-column layout
The widgets come with a predefined style but you can customize it.
- Update the content of the style tag with the following to apply a two-column layout:
CSS
-
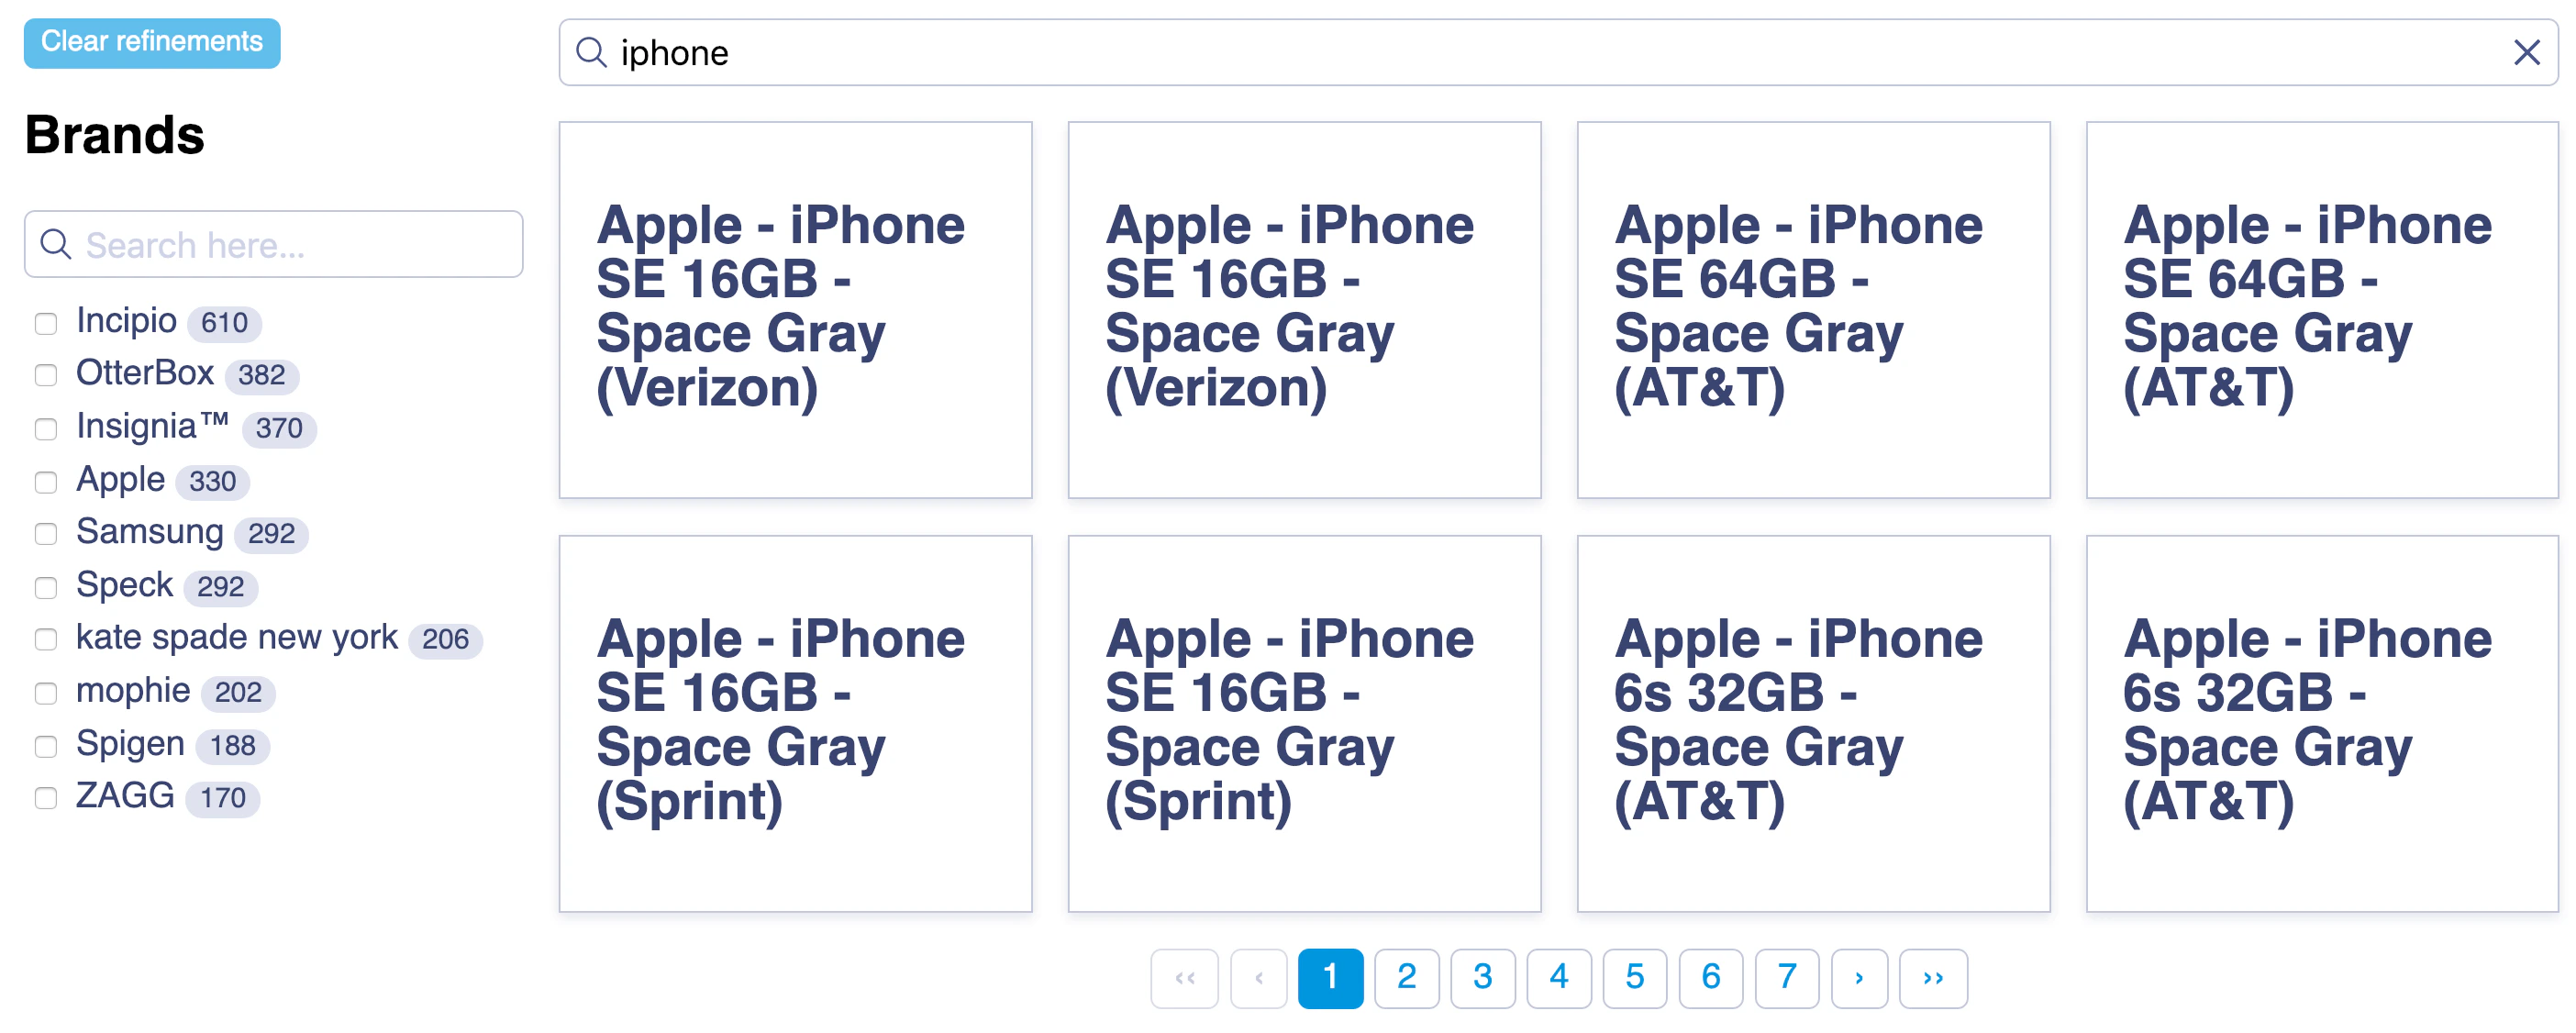
In your browser, after a page refresh, the layout includes a Brands .
6
Format search results
Open
src/App.vue and replace the content of the ais-hits item slot with:Vue
7
Refine the styling
- Update the content of the style tag with:
CSS
-
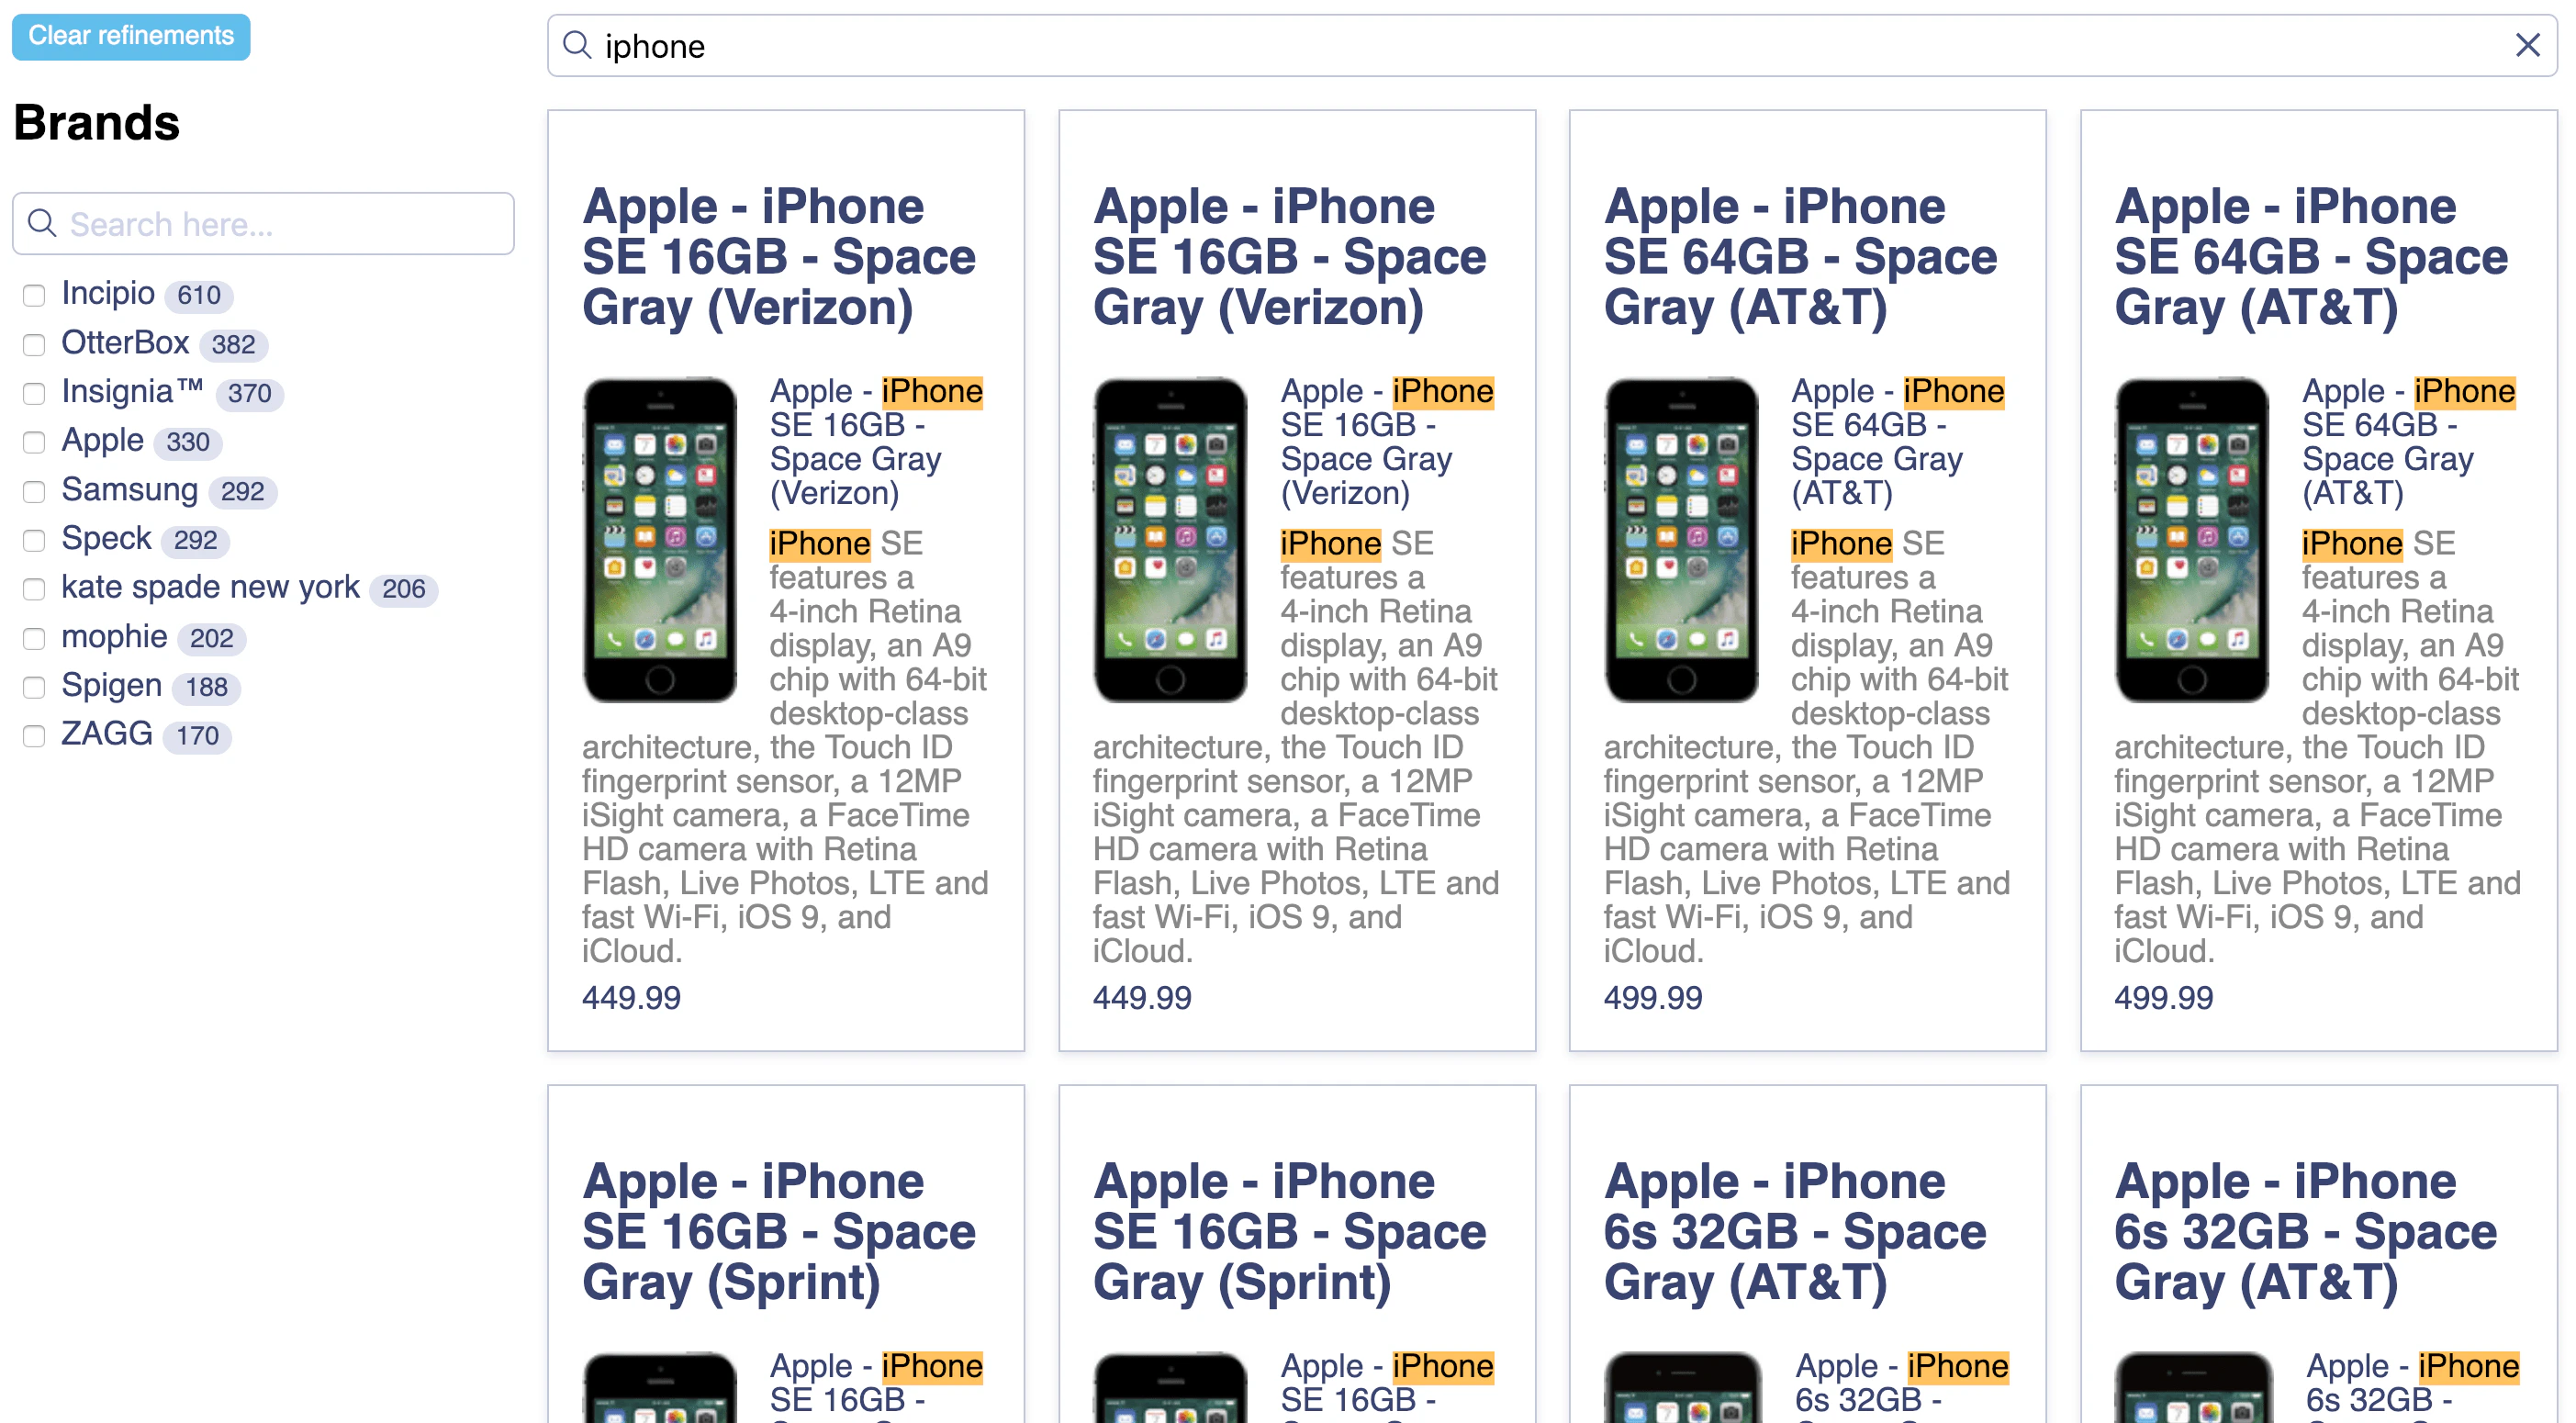
In your browser, after a page refresh, you’ll see product images.
The widgets
This quickstart uses several InstantSearch widgets:ais-instant-searchis the root Vue InstantSearch component. You must wrap all other widgets inside this component.ais-search-boxdisplays a search box for users to type queries into.ais-hitsdisplays the results from Algolia, based on the .ais-clear-refinementsdisplays a button that clears the current refinements.ais-refinement-listdisplays a list of brands that users can use to filter the search.ais-configurepasses search parameters. In this example, it setshitsPerPageto 8.ais-paginationadds navigation controls to browse through pages of results.
Next steps
Instead of the credentials fromcreate-instantsearch-app,
use your own Algolia credentials.
You can send your own data or a sample dataset to Algolia using the JavaScript API client that comes preinstalled with create-instantsearch-app.
Then, configure the index with the JavaScript API client.
For example, to configure the sample dataset,
use the following code:
JavaScript
Initializing your app
If you’re using your app instead ofcreate-instantsearch-app,
initialize it by changing the contents of main.js to include the Vue InstantSearch library: