userID could serve as the object ID.
JSON
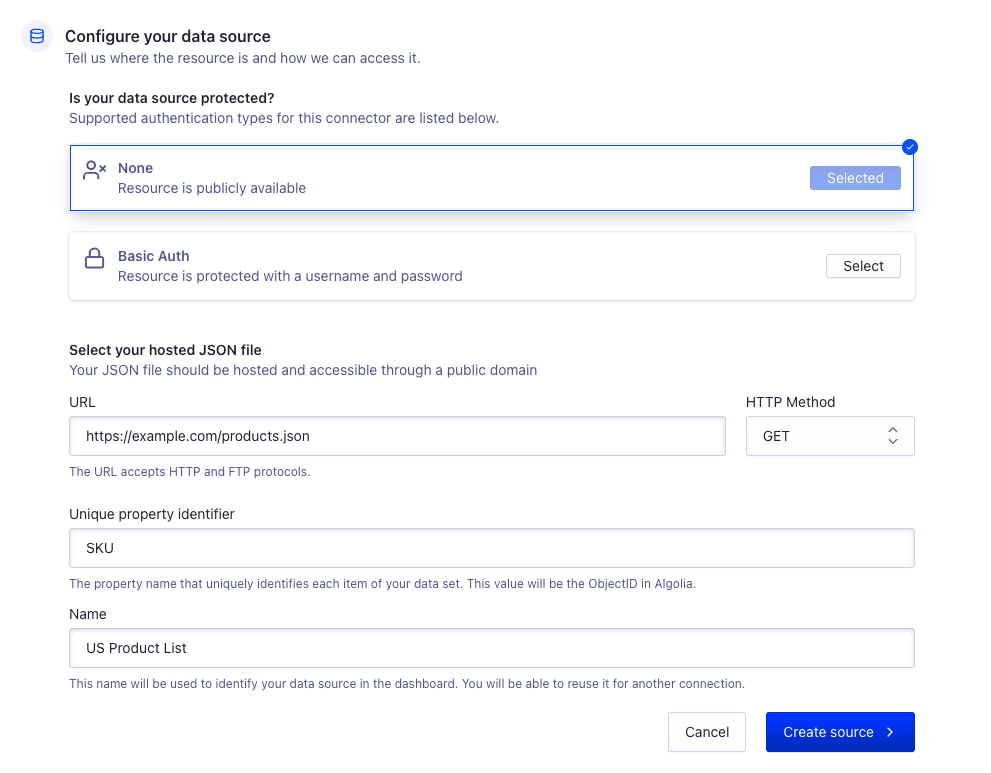
Configure your data source
- Open the Connectors page in the Algolia dashboard.
- Select the JSON connector and click Connect.
- Click Get started.
-
Select the authentication method:
- None if the file is public.
- Basic Auth if you need a username and password to access the file.
-
Enter the URL of your JSON file. The protocol can be one of:
http,https,ftp,ftps, orsftp. For HTTP URLs, you can further select whether to fetch the JSON file with a GET or a POST request. This depends on your server. -
In the Unique property identifier field, enter the property of your JSON objects that should serve as unique identifiers for your Algolia records (
objectID). - Enter a name for the source. This helps you distinguish between different sources.
- Click Create source.

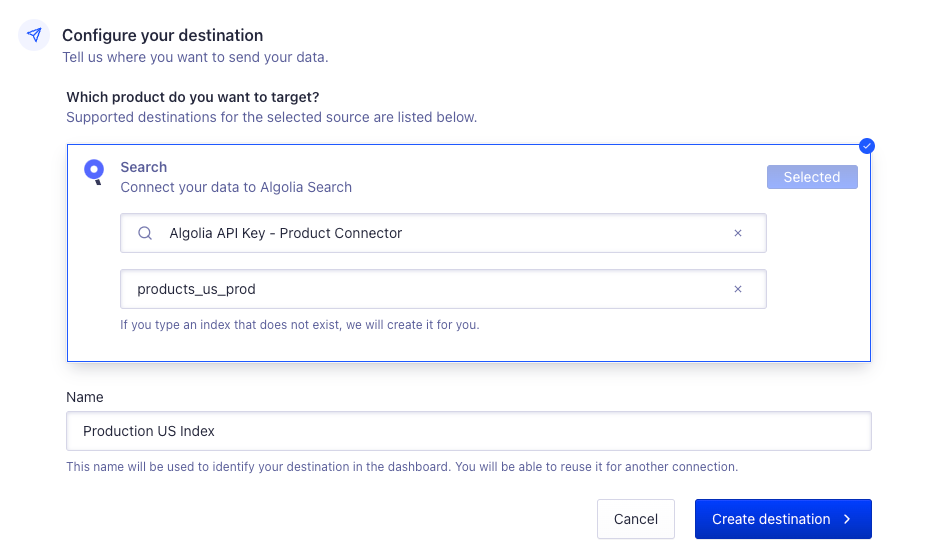
Configure your destination
- Create a new Algolia API key or select an existing one for indexing your data.
- Enter an index name, where the connector should store the records. If you enter a name of an existing index, it’ll be overwritten.
- Enter a name for the destination. This helps you distinguish between different destinations.
- Click Create destination.

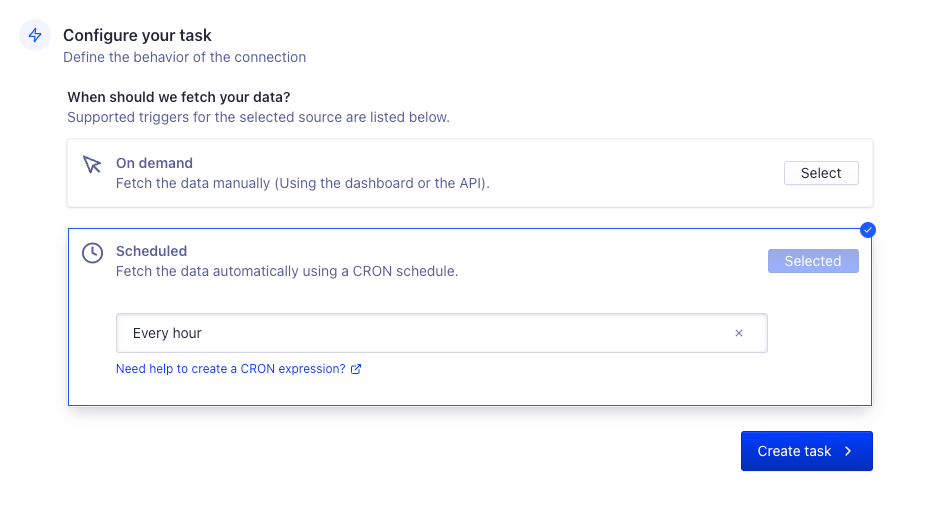
Configure your task
-
Select when the connector should fetch your data:
- On demand. The connector only fetches data if you manually run it from the Tasks.
- Scheduled. The connector runs on a schedule. You can select a schedule from the list, or enter a custom schedule with a cron expression.
- Click Create task.
