- A search box for users to type queries
- A list to display search results
- A list to results
- Statistics about the search
Before you begin
To use InstantSearch, you need an Algolia account. Sign up for a new account or use the following credentials (which include a pre-loaded dataset of products appropriate for this guide):- :
latency - Search :
1f6fd3a6fb973cb08419fe7d288fa4db
- name:
instant_search
Create a new project and add InstantSearch Android
In Android Studio, create a new project:- Select Phone and Tablet template
- Select Empty Compose Activity screen
Add project dependencies
In yourgradle/libs.version.toml file, add the following:
TOML
build.gradle.kts file,
under the app module,
add the following in the dependencies block:
Kotlin
gradle/libs.version.toml:
TOML
build.gradle.kts:
Kotlin
AndroidManifest.xml must include the following permissions:
XML
kotlinx.serialization by adding the serialization plugin to your build.gradle:
Kotlin
Implementation
Application architecture overview
MainActivity: this activity controls displayed viewsMainViewModel: aViewModelfrom Android Architecture Components. The business logic lives hereSearch: composes the search UI
Define your data class
Define a structure that represents the in your index. For simplicity’s sake, this structure only provides the name of the product. Add the following data class definition to theProduct.kt file:
Kotlin
Add search business logic
You need three components for the basic search experience:HitsSearcherperforms search requests and obtains search results.SearchBoxConnectorhandles a textual input and triggers a search request when needed.Paginatordisplays hits and manages the pagination logic.
setupConnections method establishes the connections between these components to make them work together seamlessly.
The central part of your search experience is the Searcher.
The Searcher performs a and obtains search results.
Most InstantSearch components connected to the Searcher.
In this tutorial you’re targeting one index, so instantiate a HitsSearcher with the proper credentials.
Create a new MainViewModel.kt file and add the following:
Kotlin
ViewModel in your MainActivity by adding the following:
Kotlin
ViewModel is a good place to put your data sources. This way, the data persists during configuration changes.
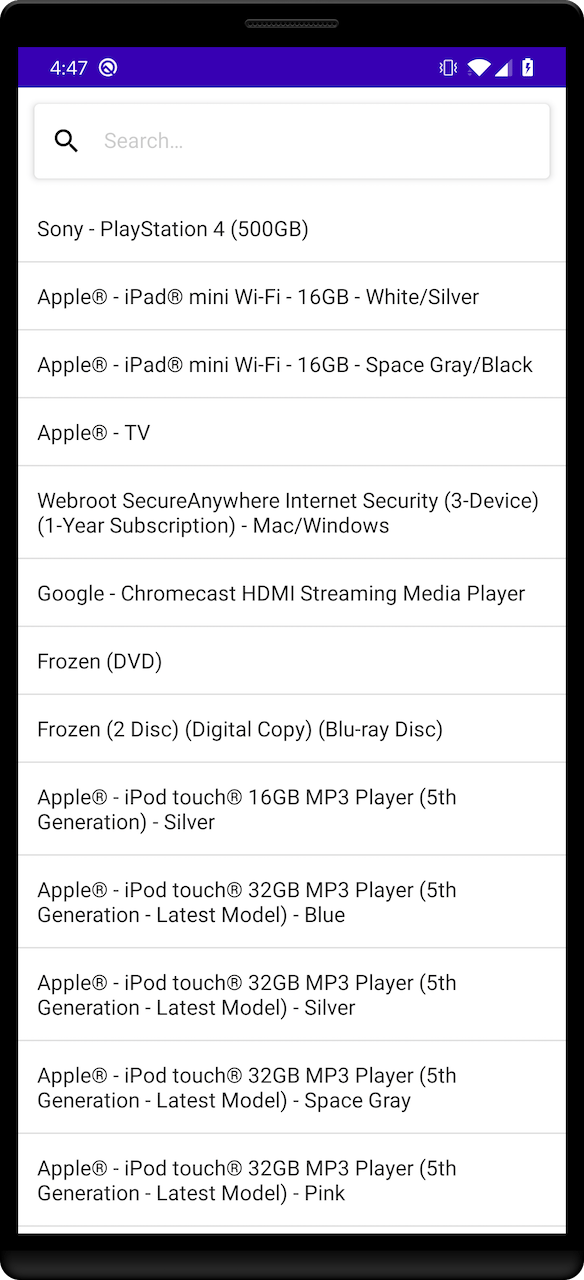
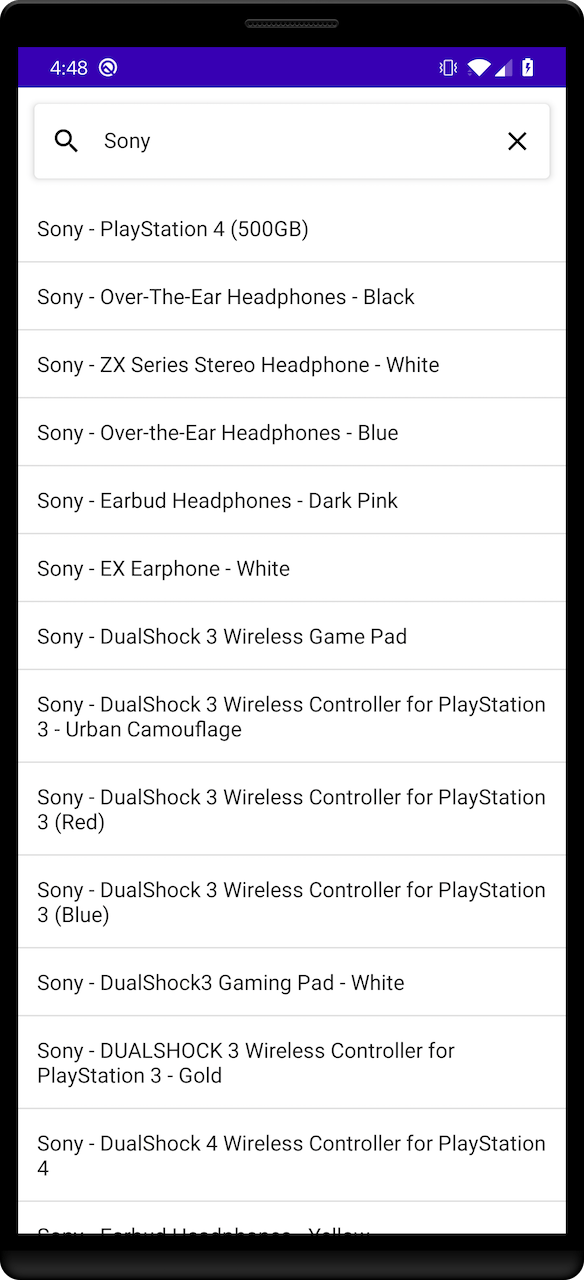
Create a basic search experience: SearchBox
Create a SearchScreen.kt file that holds the search UI.
Add a composable function ProductsList to display a list of products, the hit row represented by a column with a Text presenting the name of the item and a Divider:
Kotlin
SearchBox and ProductsList views together:
Kotlin
Search composable into the setContent section in MainActivity and pass it your business logic components from MainViewModel:
Kotlin
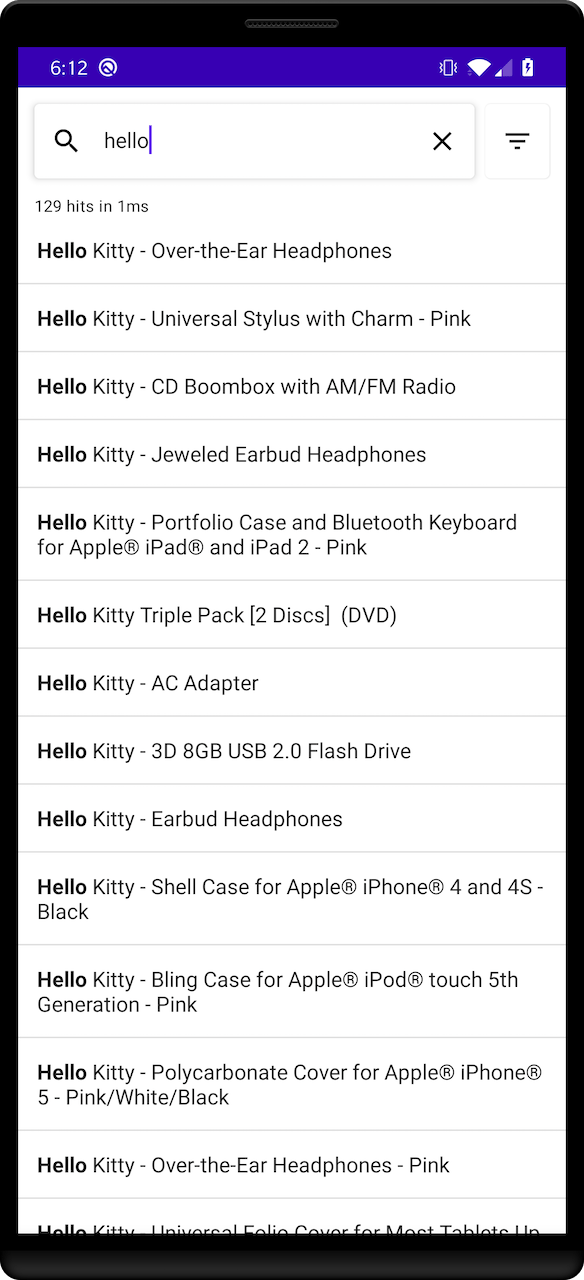
Displaying metadata: Stats
To make the search experience more user-friendly, you can give more context about the search results to your users.
You can do this with different InstantSearch modules.
First, add a statistics component.
This component shows the hit count and the request processing time.
This gives users a complete understanding of their search, without the need for extra interaction.
The StatsConnector extracts the metadata from the search response, and provides an interface to present it to users.
Add the StatsConnector to the MainViewModel and connect it to the Searcher.
Kotlin
StatsConnector receives the search statistics now, but doesn’t display it yet.
Create a new composable Stats:
Kotlin
Stats composable into the Column, in the middle of the SearchBox and ProductsList:
Kotlin
MainActivity to pass StatsState instance to Search:
Kotlin
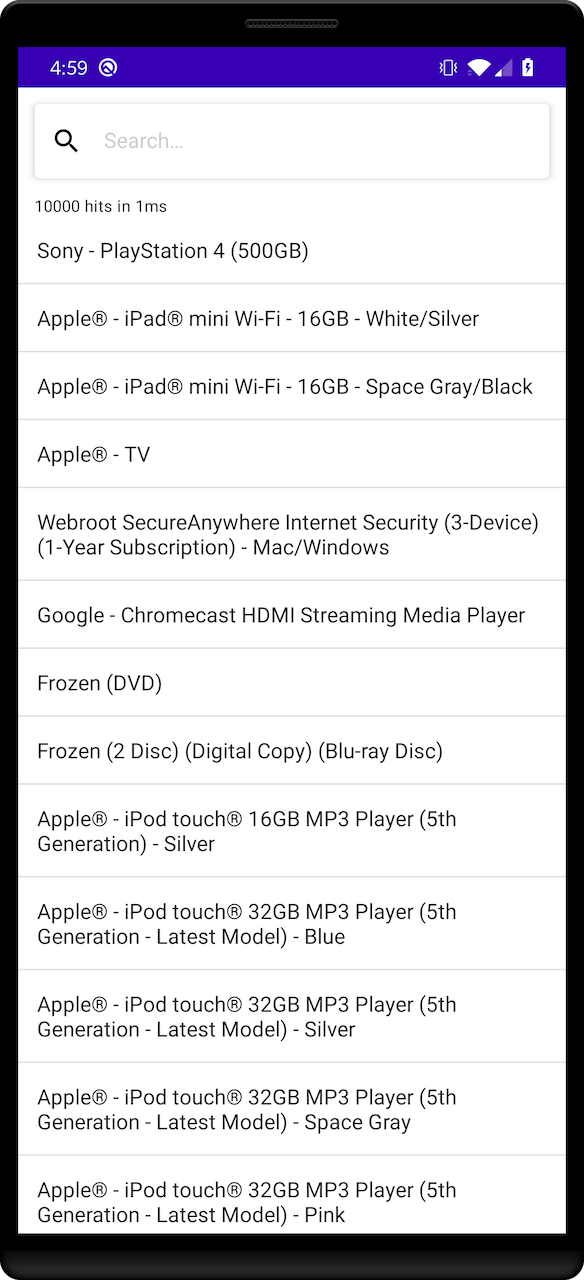
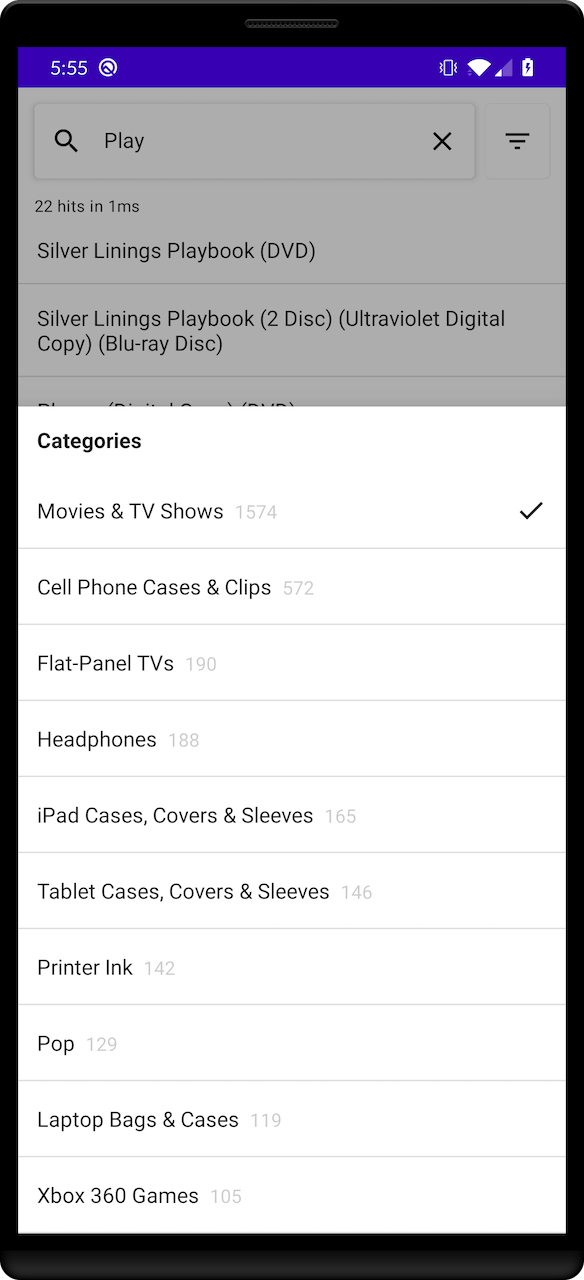
Filter your results: FacetList
With your app, you can search more than 10,000 products. But, you don’t want to scroll to the bottom of the list to find the exact product you’re looking for.
One can more accurately filter the results by making use of the FilterListConnector components.
This section explains how to build a filter that allows to filter products by their category. First, add a FilterState component to the MainViewModel.
This component provides a convenient way to manage the state of your filters. Add the manufacturer refinement attribute.
Next, add the FilterListConnector, which stores the list of facets retrieved with search result. Add the connections between HitsSearcher, FilterState and FilterListConnector.
Kotlin
FacetRow composable to display a facet.
The row represented by a column with two Text s for the facet value and count,
plus an Icon to display a checkmark for selected facets:
Kotlin
FacetList composable to display facets list.
Use a Text for the attribute and a LazyColumn to display FacetRow s:
Kotlin
ModalBottomSheetLayout:
- Inside
content, put your earlierSearchcontent, addclickablefilterIconto show the facets list - Create
FacetListinsidesheetContentto display your facets list.
Kotlin
Search in MainActivity to include the instance of FacetListState from your MainViewModel:
Kotlin
Improve the user experience: Hightlighting
Highlighting enhances the user experience by putting emphasis on the parts of the result that match the query. It’s a visual indication of why a result is relevant to the query.
You can add highlighting by implementing the Highlightable interface on Product.
Define a highlightedName field to retrieve the highlighted value for the name attribute.
Kotlin
.toAnnotatedString() extension function to convert an HighlightedString into a AnnotatedString assignable to a Text to display the highlighted names.
Kotlin