- A search box for users to type queries
- A list to display search results
- A list to results
- Statistics about the search
Before you begin
To use InstantSearch, you need an Algolia account. Sign up for a new account or use the following credentials (which include a pre-loaded dataset of products appropriate for this guide):- :
latency - Search :
1f6fd3a6fb973cb08419fe7d288fa4db
- name:
instant_search
Create a new project and add InstantSearch Android
In Android Studio, create a new Project:- On the Target screen, select Phone and Tablet
- On the Add an Activity screen, select Empty Activity
build.gradle, add the following dependency:
build.gradle
build.gradle
AndroidManifest.xml must include the following permissions:
XML
kotlinx.serialization by adding the serialization plugin to your build.gradle:
build.gradle
Implementation
Architecture overview
MainActivity: This activity controls the displayed fragment.MyViewModel: AViewModelfrom Android Architecture Components. The business logic lives here.ProductFragment: This fragment displays a list of search results in aRecyclerView, aSearchViewinput, and aStatsindicator.FacetFragment: This fragment displays a list of facets to filter your search results.
Initialize a searcher
The central part of your search experience is theSearcher.
The Searcher performs a and obtains search results.
Most InstantSearch components connected to the Searcher.
In this guide, you’ll only target one index, so instantiate a HitsSearcher with the proper credentials.
Go to MyViewModel.kt file and add the following code:
Kotlin
ViewModel is a good place to put your data sources. This way, the data persists during orientation changes and you can share it across multiple fragments.
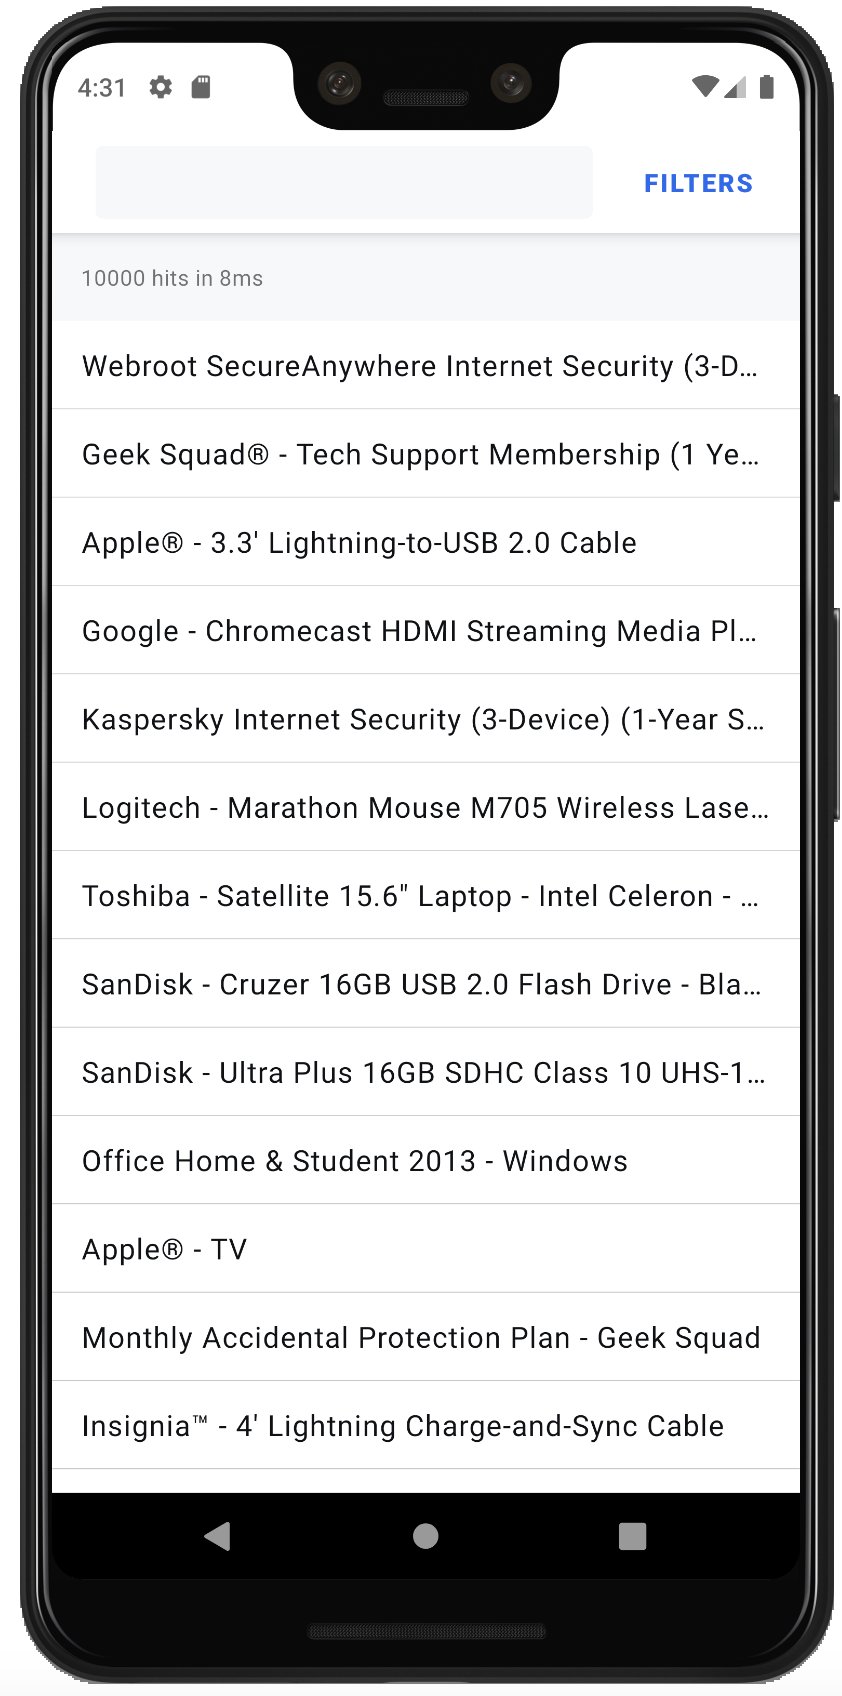
Display results: Hits
Suppose you want to display search results in a RecyclerView.
To simultaneously provide a good user experience and display thousands of products,
you can implement an infinite scrolling mechanism using the Paging Library from Android Architecture Component.
1
Create the data source
Create a
LiveData object, which holds a PagedList of Product.
Create the Product data class which contains a single name field.Kotlin
2
Define the item layout
Create the
product_item.xml file.XML
3
Implement a ViewHolder
Create the
ProductViewHolder to bind a Product item to a RecyclerView.ViewHolder.Kotlin
4
Create an adapter
Create a
ProductAdapter by extending PagingDataAdapter. The ProductAdapter binds products to the ViewHolder.Kotlin
5
Connect the searcher and paginator
In your
ViewModel use a Paginator with your searcher:Kotlin
6
Create the fragment layoutr
Now that your
ViewModel has some data, you can create a simple product_fragment.xml with a Toolbar and a RecyclerView to display the products:XML
7
Observe and display results
In the To display the Update You have now learned how to display search results in an infinite scrolling
ProductFragment, get a reference of MyViewModel using activityViewModels().
Then, observe the LiveData to update the ProductAdapter on every new page of products.
Finally, configure the RecyclerView by setting its adapter and LayoutManager.Kotlin
ProductFragment, update activity_main.xml to have a container for the fragments:XML
MainActivity to display ProductFragment:Kotlin
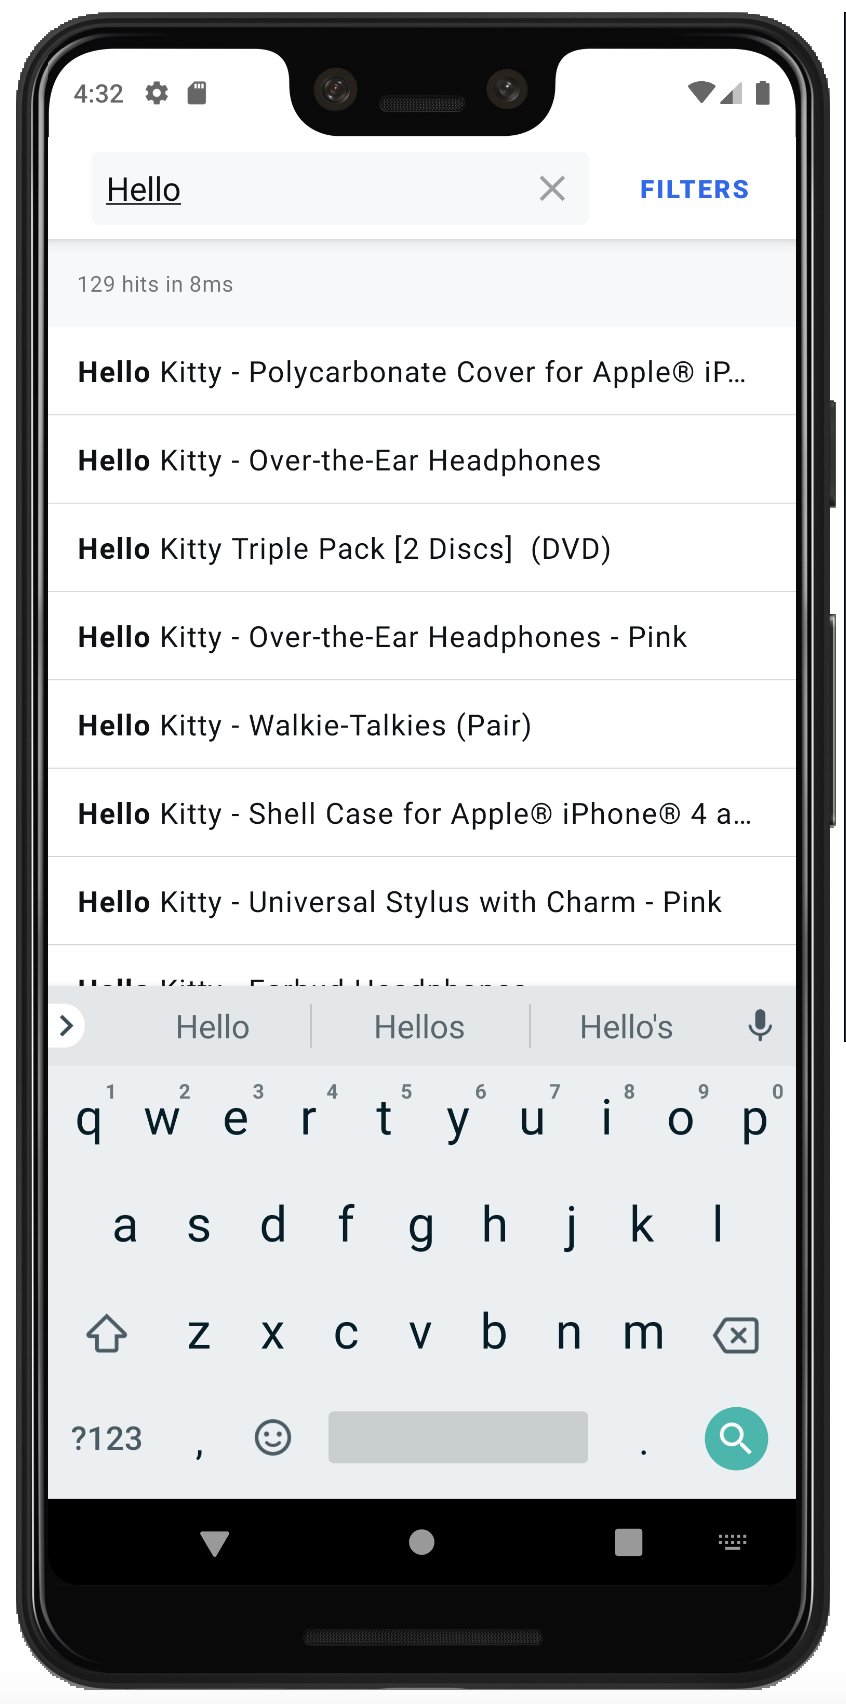
RecyclerView.Searching your data: SearchBox
To search your data, users need an input field. Any change in this field should trigger a new request, and then update the search results.
To achieve this, use a SearchBoxConnector. This takes a Searcher and connected to Pagiantor using connectPaginator.
Kotlin
SearchView in your Toolbar:
XML
SearchBoxViewAppCompat to the SearchBoxConnectorPagedList stored in MyViewModel using a new ConnectionHandler that conforms to the ProductFragment lifecycle:
Kotlin
Displaying metadata: Stats
It’s a good practice to show the number of hits that were returned for a search. You can use the Stats components to do this with minimal code.
Add a StatsConnector to your MyViewModel, and connect it with a ConnectionHandler.
Kotlin
TextView to your product_fragment.xml file to display the stats.
XML
StatsConnector to a StatsTextView in your ProductFragment.
Kotlin
Filter your data: FacetList
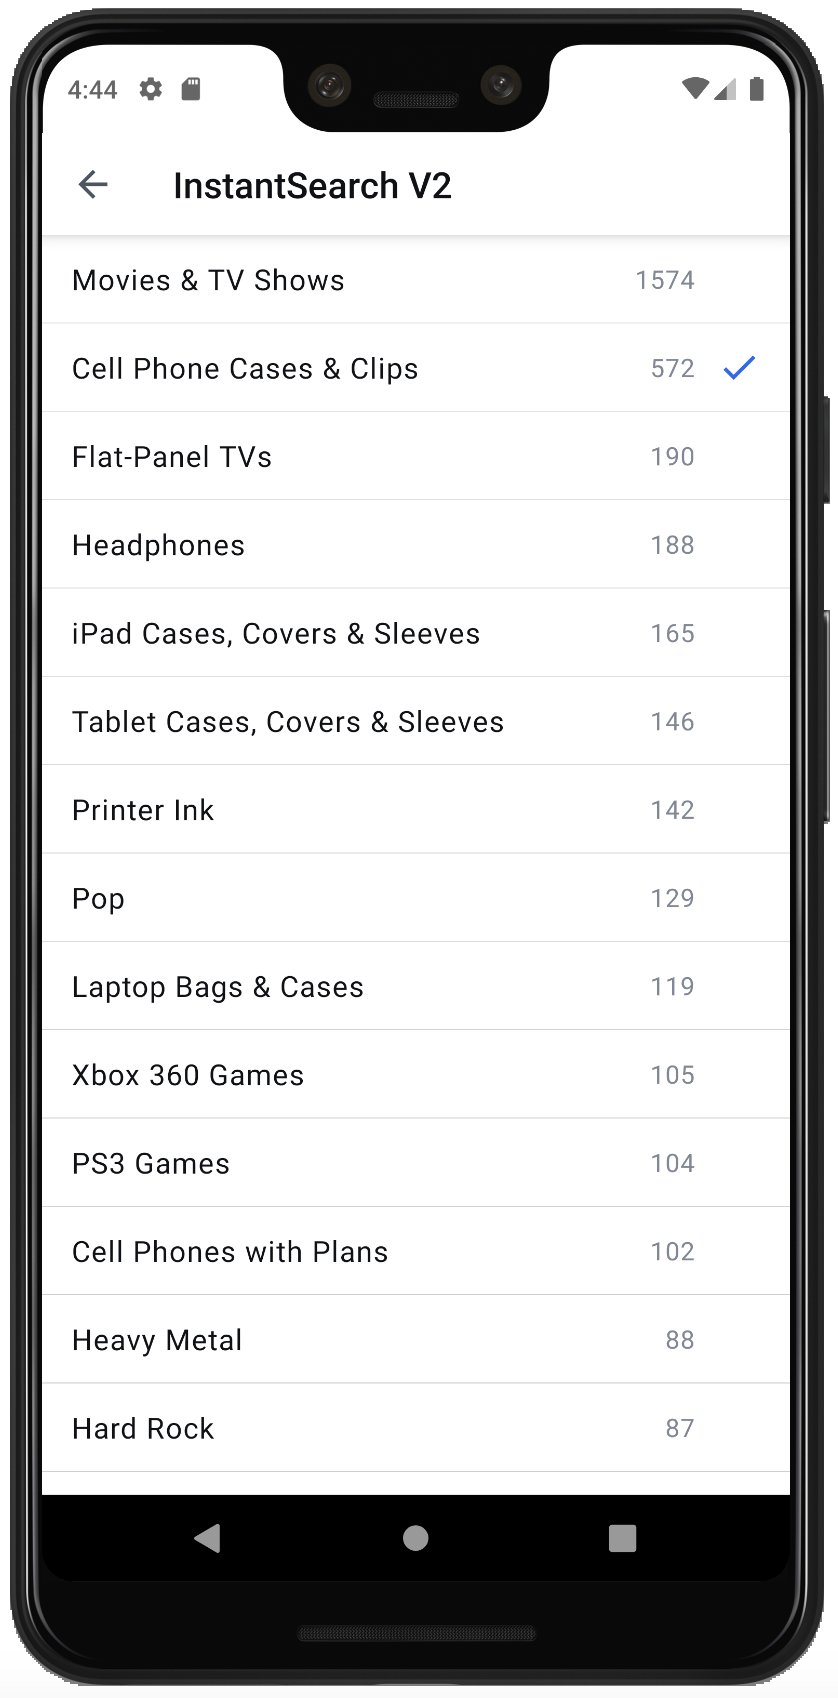
FacetList to filter products by category.
Create a drawable resource ic_check.xml. This resource displays checked filters.
XML
facet_item.xml file. This is the layout for a RecyclerView.ViewHolder.
XML
FacetListViewHolder and its Factory, so that later on it works with a FacetListAdapter.
Kotlin
FilterState.
Pass the FilterState to your FacetListConnector. The FacetListConnector needs an attribute: you should use "categories".
Inject MyFacetListViewHolder.Factory into your FacetListAdapter. The FacetListAdapter is an out of the box RecyclerView.Adapter for a FacetList.
Connect the different parts together:
- The
Searcherconnects itself to theFilterState, and applies its filters with every search. - The
FilterStateconnects to your productsPaginatorto invalidate search results when new filter are applied. - The
facetListconnects to its adapter.
Kotlin
facet_fragment.xml layout with a RecyclerView.
XML
FacetFragment and configure your RecyclerView with its adapter and LayoutManager.
Kotlin
FacetFragment in MainActivity with “navigation up” support.
Kotlin
product_fragment.xml
XML
displayFilters and navigateToFilters() to MyViewModel to trigger filters display:
Kotlin
ProductFragment, add a listener to the filters button to switch to FacetFragment:
Kotlin
FacetFragment:
Kotlin
Improving the user experience: Highlighting
Highlighting enhances the user experience by putting emphasis on the parts of the result that match the .
It’s a visual indication of why a result is relevant to the query.
You can add highlighting by implementing the Highlightable interface on Product.
Define a highlightedName field to retrieve the highlighted value for the name attribute.
Kotlin
.toSpannedString() extension function to convert an HighlightedString into a SpannedString that can be assigned to a TextView to display the highlighted names.
Kotlin
Conclusion
You now have a fully working search experience: your users can search for products, refine their results, and understand the number of returned and why they’re relevant to the query.