1

Sign in to Algolia with Netlify

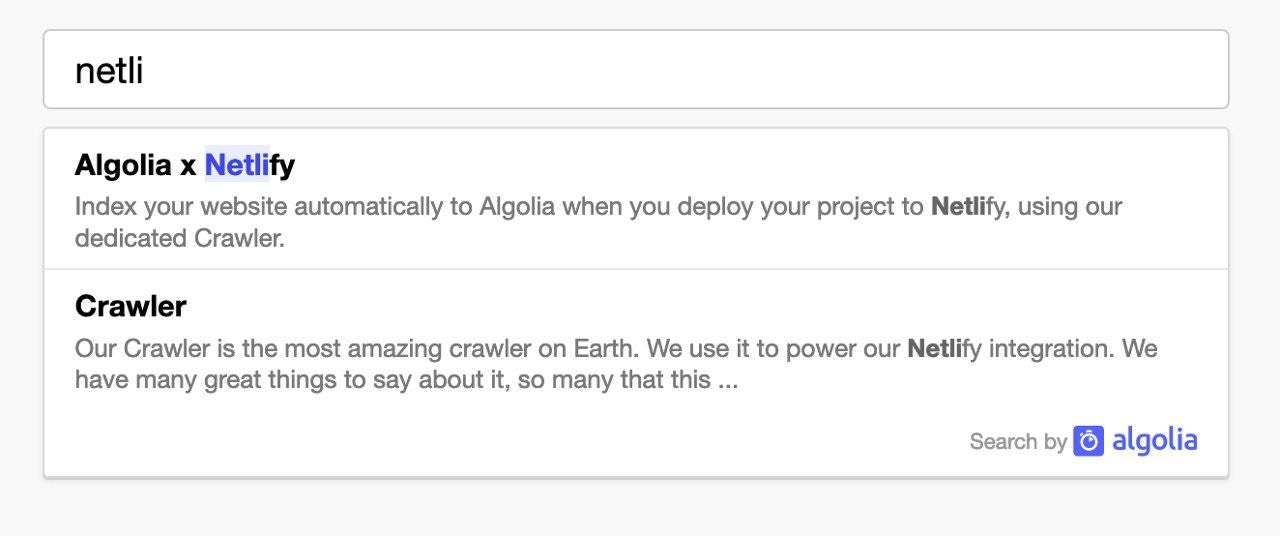
Go to Algolia Crawler for Netlify and click Sign in to Algolia with Netlify. If you don’t have an Algolia account yet, a new one is created for you.
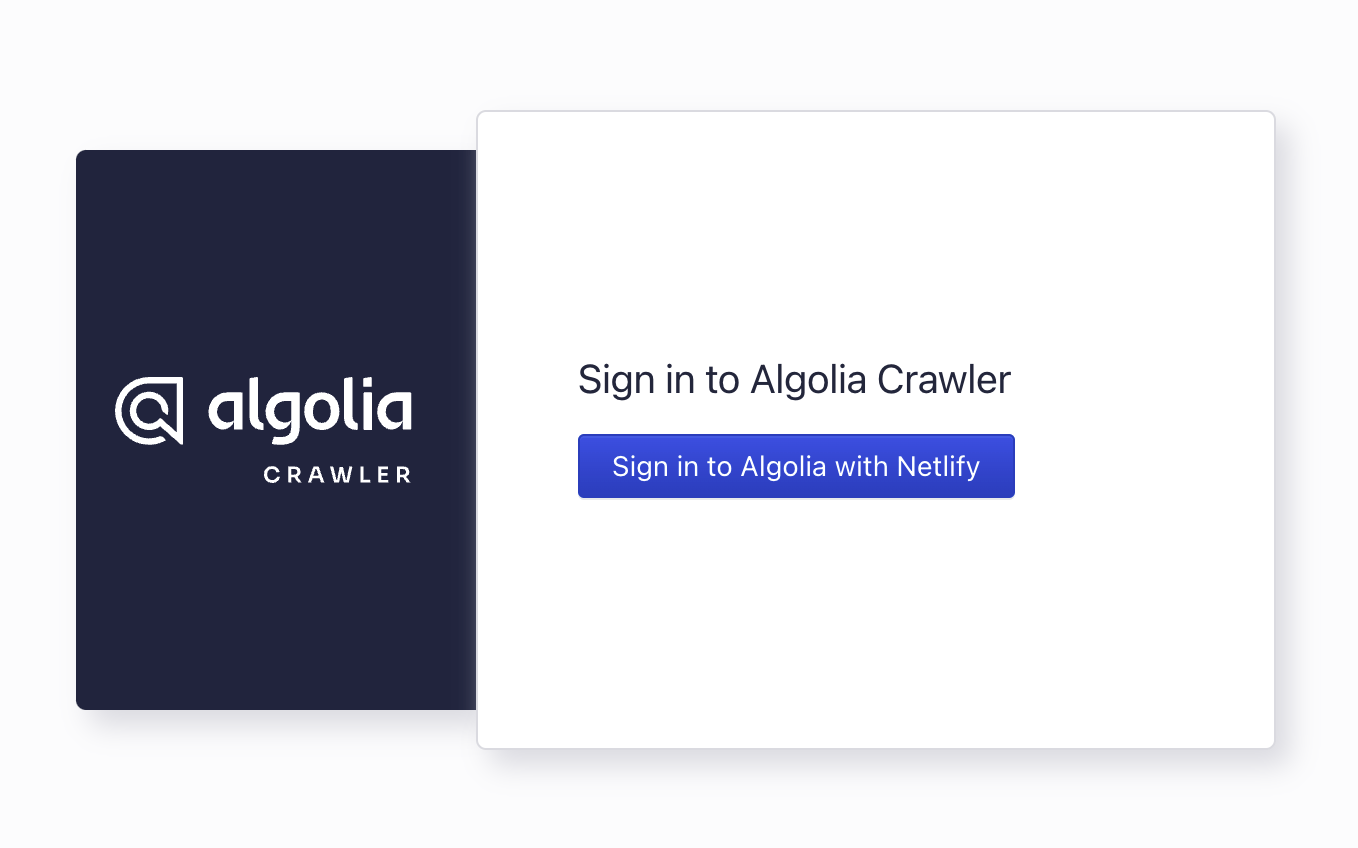
Web page with a button with the label 'Sign in to Algolia with Netlify'
2

Authorize Algolia in Netlify

On Netlify, you need to authorize Algolia to access your Netlify account, so that the plugin can update your plugin settings and add environment variables.
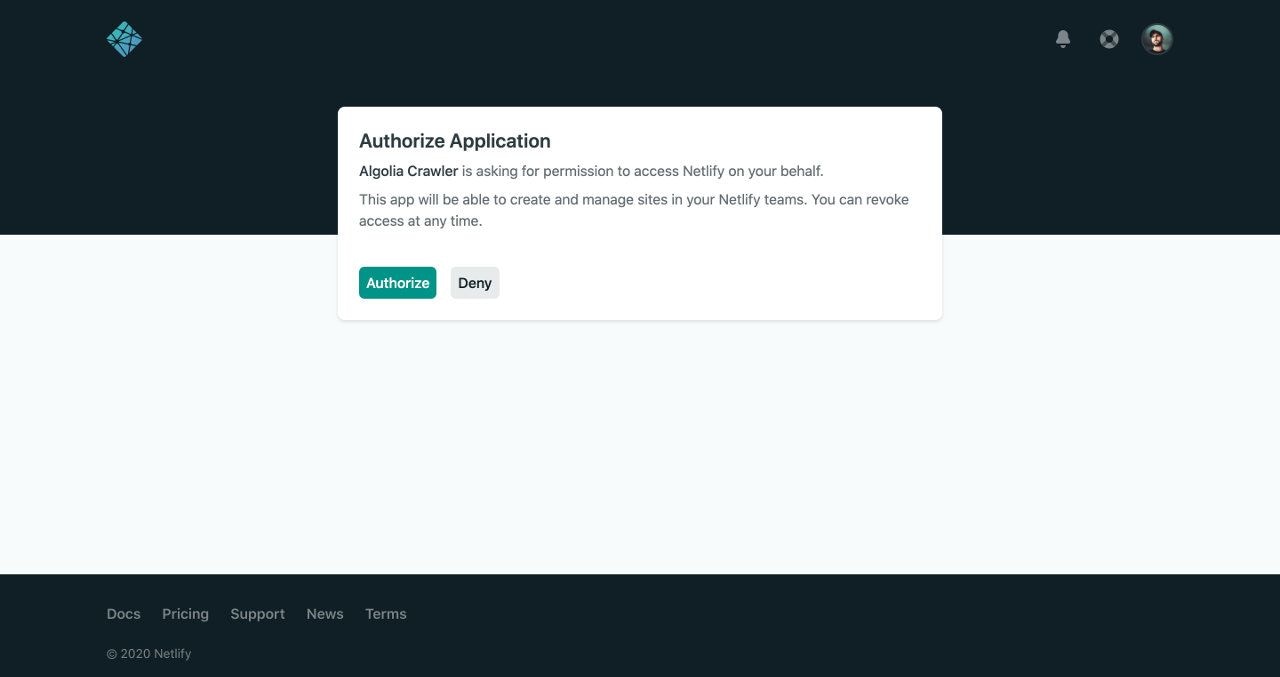
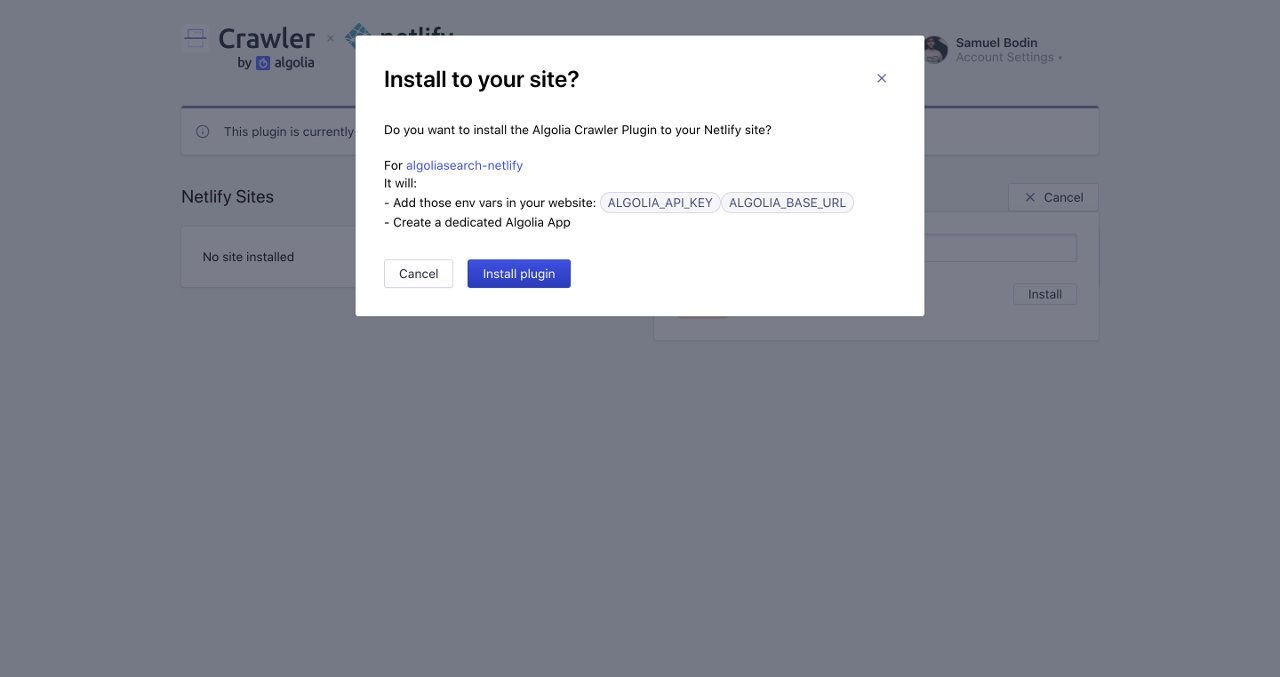
Screenshot of a dialog box titled 'Authorize Application' with an 'Authorize' button and a 'Deny' button.
3

Install plugin

  1. In the Crawler Admin Console, search for your site and click Install. Algolia adds the necessary environment variables to your Netlify site. These environment variables start with ALGOLIA_. Algolia also creates a new Algolia for your site. Search for your site in the Algolia Crawler Admin Console
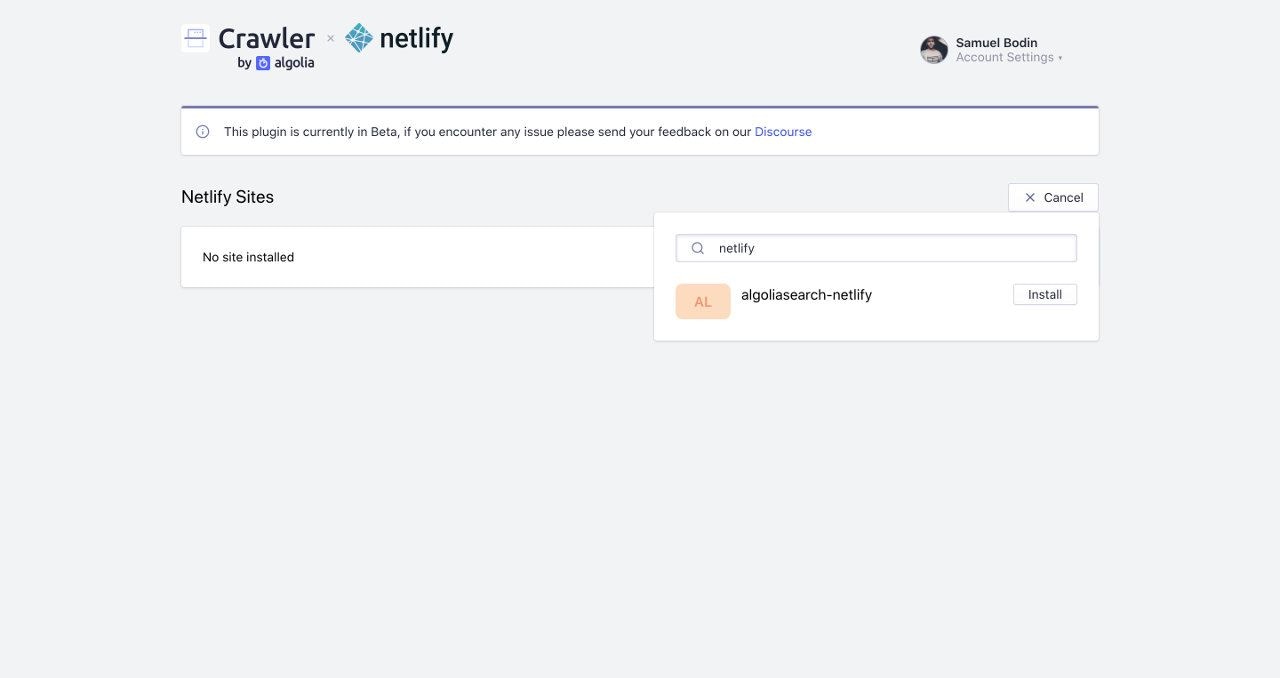
  2. Confirm by clicking Install plugin.
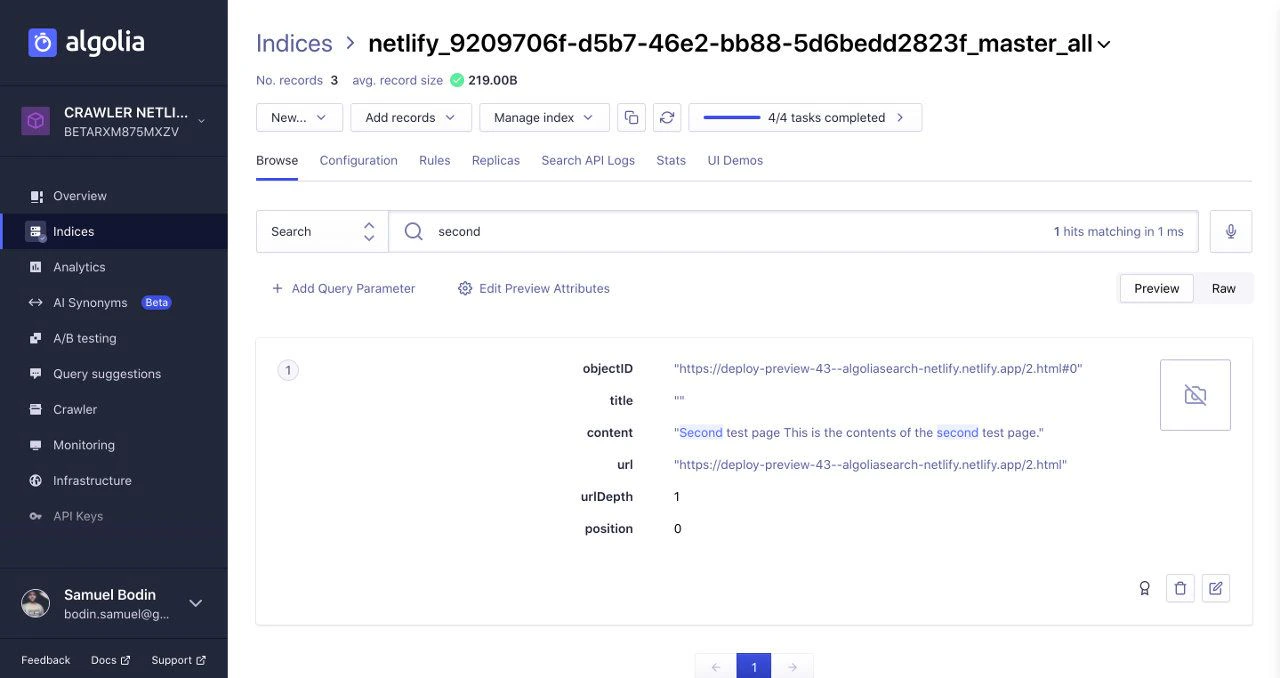
 Screenshot of a dialog box asking to install the Algolia Crawler Plugin for 'algoliasearch-Netlify' with options to 'Cancel' or 'Install plugin'.
The plugin is now installed and ready to index your site.
Screenshot of the 'Algolia for Netlify' page showing the 'Netlify Sites > algoliasearch-Netlify' section with an 'Uninstall' button and code snippet.

Indexing

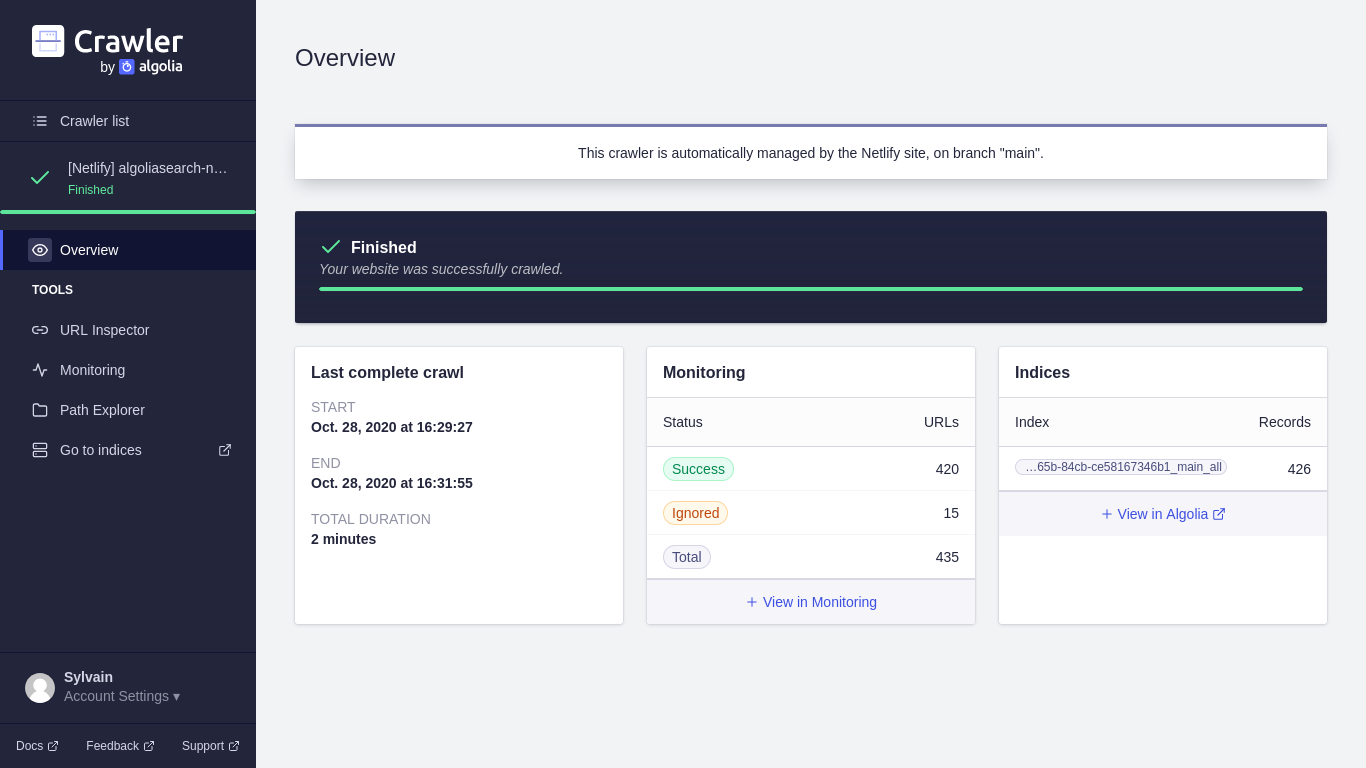
After installing the plugin, each Netlify deploy triggers a crawl, which updates an Algolia . To manually trigger a new deploy in Netlify, select any deploy and click Retry deploy > Deploy site. When it receives a build hook, the Algolia Crawler processes your website asynchronously. This operation takes some time, so there is a short delay between the first deploy and the first crawl. Your site and your Algolia index are out of sync during that delay. You can find information about your current crawler in the Netlify deploy logs.
By default, Algolia indexes the main or master branch. Algolia can still create one crawler with one index per git branch. This lets you use a production index on main and development index on develop. To enable multiple branches, you need to configure the branches plugin input. If you’re using the Algolia for Netlify frontend library, you need to pass the branch name in the library parameters.
Screenshot of a Netlify deploy page showing a 'Deploy successful' notification and summary with build time and crawler details. You can click the crawler URL to follow the progress of your crawl. Screenshot of the 'Crawler' overview page showing a finished crawl with a status of 'Success' for 420 URLs and 'Ignored' for 15 URLs. When the crawl is complete, you can check your Algolia index with the extracted . Algolia applies a default relevance configuration to your index, which you can adapt in the index settings. To learn more about what’s inside the Algolia records, see Extraction strategy Screenshot of the Algolia dashboard showing the 'Netlify' index with three records and fields like 'objectID', 'title', and 'URL'.

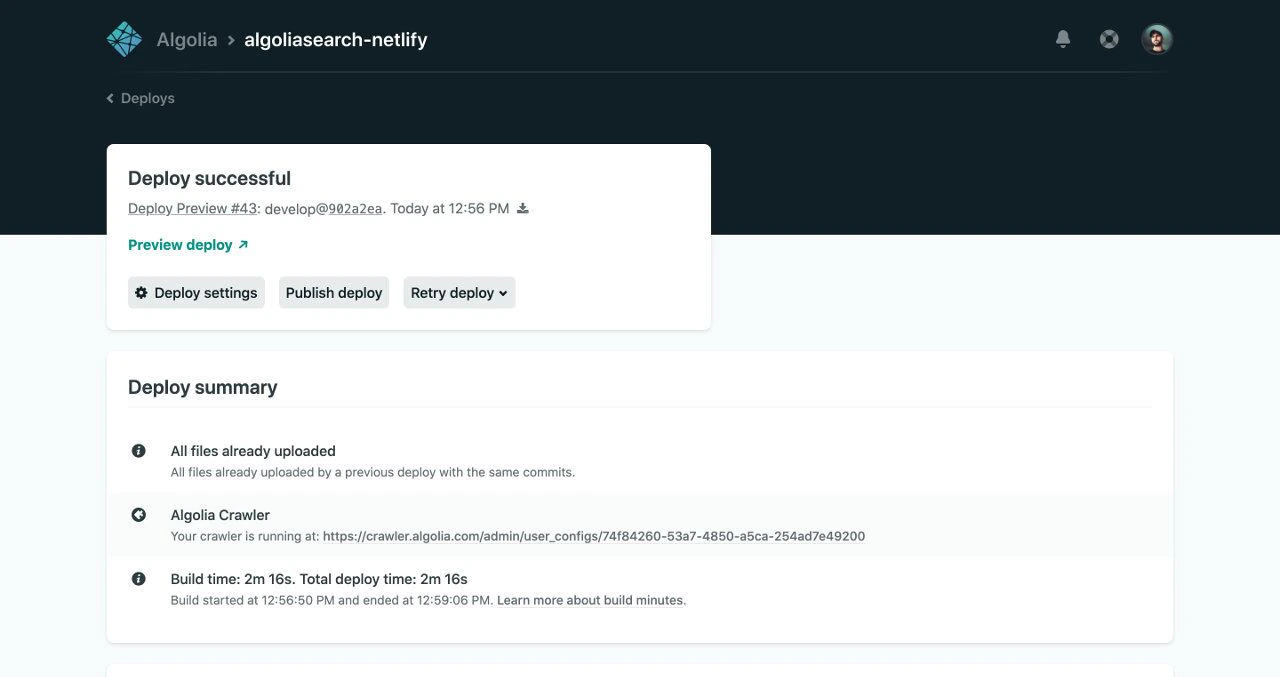
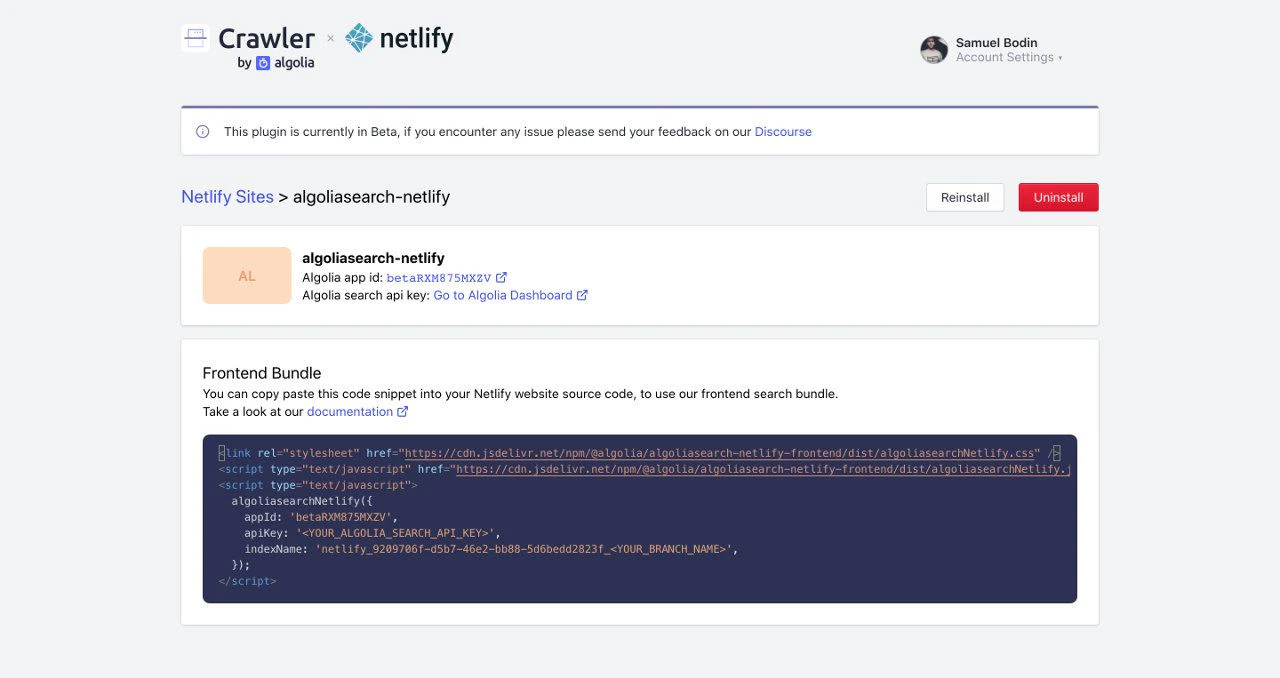
Install the frontend bundle

You can install a frontend bundle for searching in your Algolia index and navigating the search results. You can find the code snippet in your Crawler Admin Console. Make sure to replace these variable placeholders:
PlaceholderDescription
ALGOLIA_APP_IDThe unique identifier of your Algolia application
ALGOLIA_API_KEYYour Algolia search-only API key
NETLIFY_SITE_IDThe unique identifier of your Netlify site (Algolia includes this for you in the snippet from the Crawler Admin Console)
TARGET_GIT_BRANCHYour target git branch, either a fixed branch, like main, or a dynamic branch using an environment variable process.env.HEAD. For more information, see Using multiple branches.
HTML
<link
  rel="stylesheet"
  href="https://cdn.jsdelivr.net/npm/@algolia/algoliasearch-netlify-frontend@1/dist/algoliasearchNetlify.css"
/>
<script src="https://cdn.jsdelivr.net/npm/@algolia/algoliasearch-netlify-frontend@1/dist/algoliasearchNetlify.js"></script>
<script>
  algoliasearchNetlify({
    appId: 'ALGOLIA_APP_ID',
    apiKey: 'ALGOLIA_API_KEY',
    siteId: 'NETLIFY_SITE_ID',
    branch: 'TARGET_GIT_BRANCH',
    selector: 'div#search',
  })
</script>
This code snippet adds Algolia Autocomplete to the <div id="search"> element. Screenshot of a search result for a partial query showing 'Algolia x Netlify' and 'Crawler' entries with 'Search by Algolia' at the bottom right.

See also

Last modified on February 18, 2026