Add domains
- Sign in to the Algolia dashboard.
- On the left sidebar, select Data sources.
- Select Crawler:
- Click Add your domain and enter the domains or subdomains you want to crawl, for example,
algolia.com,www.algolia.com, orsupport.algolia.com. - If you’ve already added a domain, click the Domains tab.
- Click Add your domain and enter the domains or subdomains you want to crawl, for example,
- Click Add domain.
Verify your domain
Email verification is the default, automated way of verifying your domain ownership. If you validated your email when you first set up an Algolia account, the domain of this email address is compared with your crawler site domain. If they match, your domain is verified. Check the verification status from the Domains page in the Crawler dashboard. If the site and email domains don’t match, you need to verify your site with one of these methods: meta tag, HTML file, DNS record, or robots.txt.- If you can’t update your server files, choose the DNS record option.
- If you can update files, the meta tag option is the best choice as it doesn’t require adding an extra HTML file. The robots.txt method is an older option that was the only way to verify in earlier versions of the Crawler.
Meta tags
To add a domain verification code to a meta tag, open the Meta tag tab.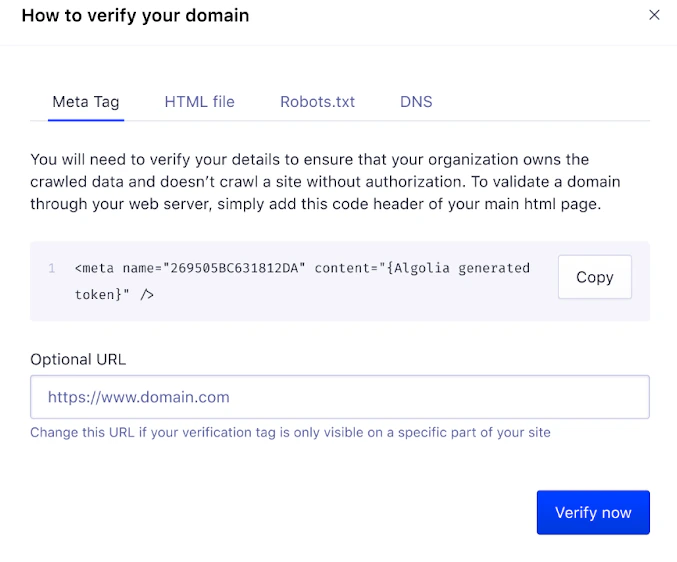
Don’t insert the tag as a Google Tag Manager (GTM) script tag.
If you do, the Crawler ignores it.
HTML file
To add a verification code to a custom HTML file, open the HTML file tab.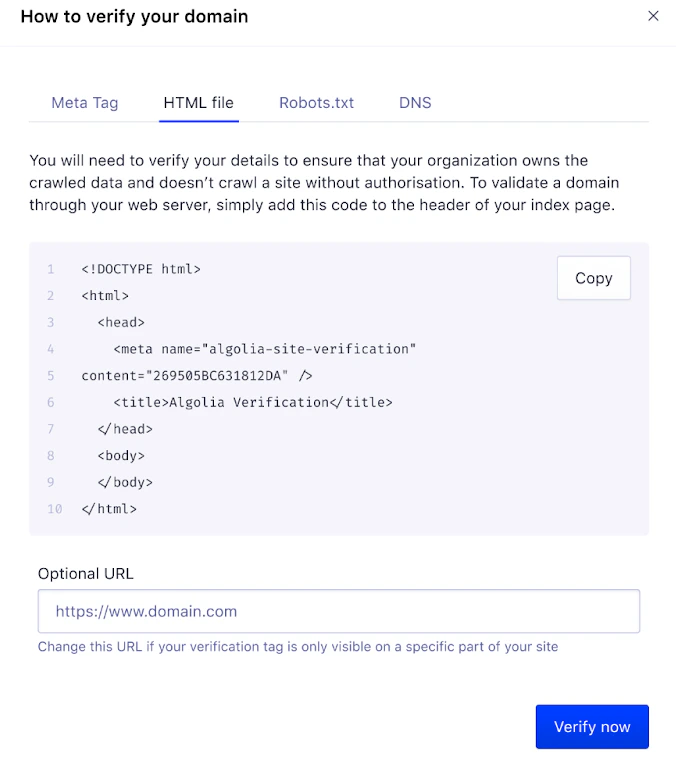
- Click Copy.
- Save the copied content as a new HTML file and upload it to your web server.
- Add the file’s URL to Optional URL. The URL must be within the domain you’re verifying.
- Click Verify now next to the appropriate domain on the Domains page in the Crawler dashboard.
robots.txt
To add a verification code to yourrobots.txt file, open the Robots.txt tab.

robots.txt file.
DNS
To add a verification code to your DNS records, open the DNS tab.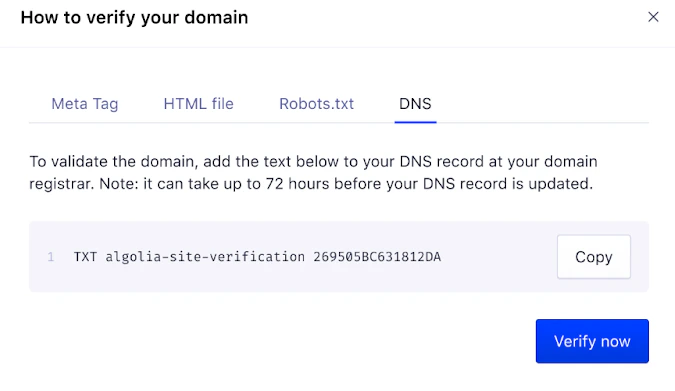
- Click Copy or take note of the provided DNS TXT record data.
- On your DNS provider’s site, locate the section responsible for managing DNS and select an action to add a new record.
-
Copy the provided DNS TXT record data into the respective fields on your DNS provider’s site. For example:
- Type:
TXT - Host:
algolia-site-verification - Value/Answer:
269505BC631812DA(in the example)
- Type:
Create a new crawler
After verifying your domain, you can create a new crawler.- Open the Crawler page in the Crawler dashboard.
-
Click New Crawler and enter the following information:
- Your crawler name. Enter a descriptive name for your crawler.
- App ID. Enter the same Algolia application ID you specified when adding a domain. The indices and extracted are added to this application.
- Start URL. Enter a URL as the starting point for the crawler. The best starting URL is your domain’s home page. The Crawler uses your
sitemap.xmlto find its starting URLs. If your site doesn’t have a sitemap, enter the URL with the most links to other pages. - Crawler template. If you want to configure a new crawler for one of the supported static site generators, select that configuration template. Otherwise, select the default template.
- Click Create to finish the configuration of your crawler and run a test crawl.
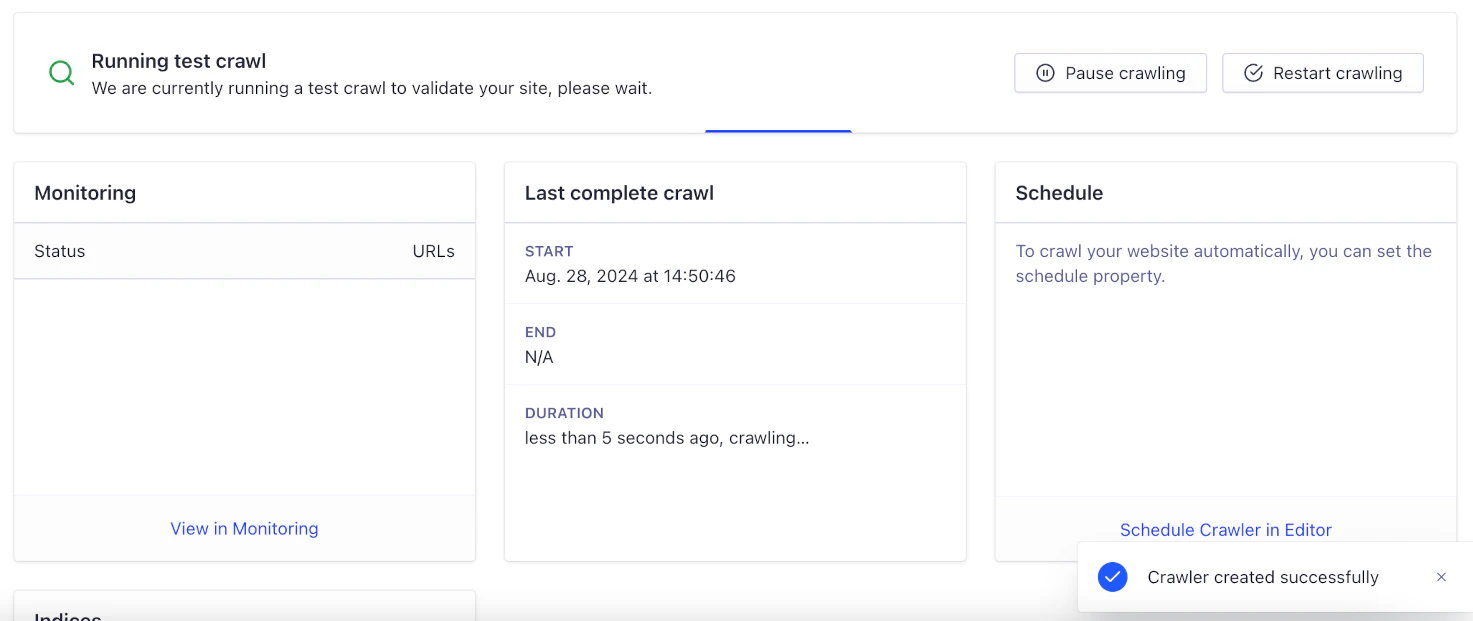
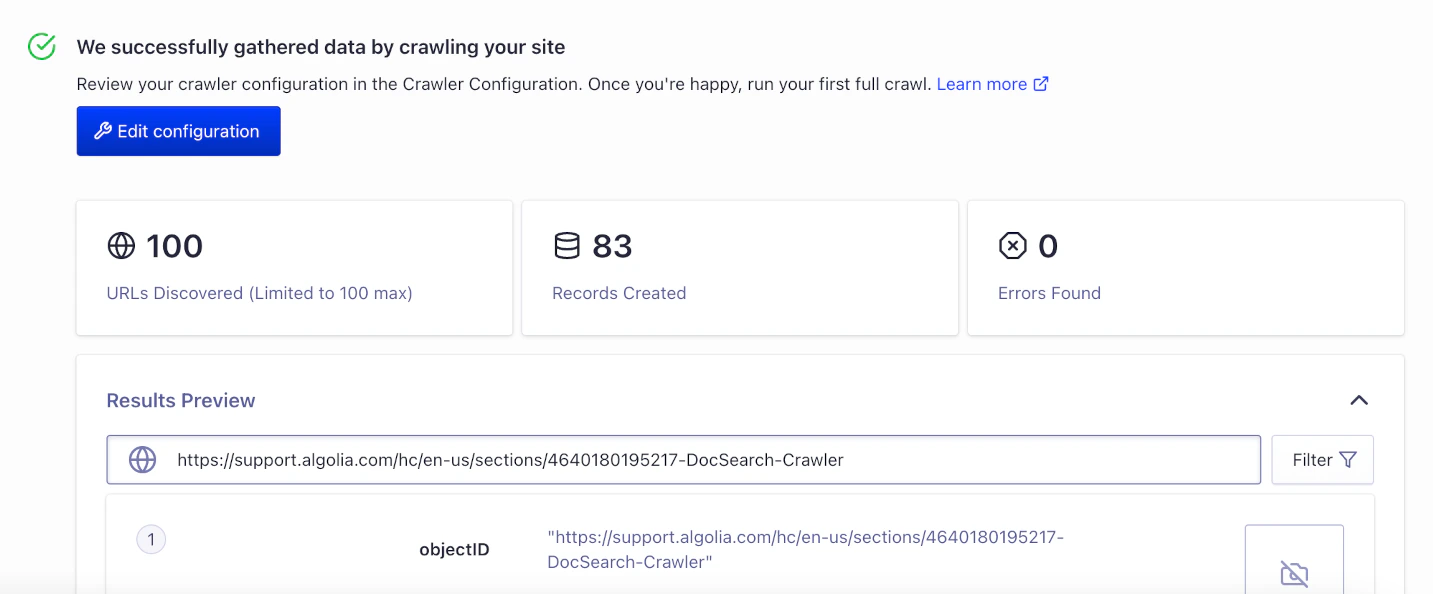
Run the test crawl
To test if the crawler can access your site, find links, extract content, and upload them to an Algolia , the initial crawl visits up to 100 URLs. For a summary of in-progress crawls, go to the Overview page.